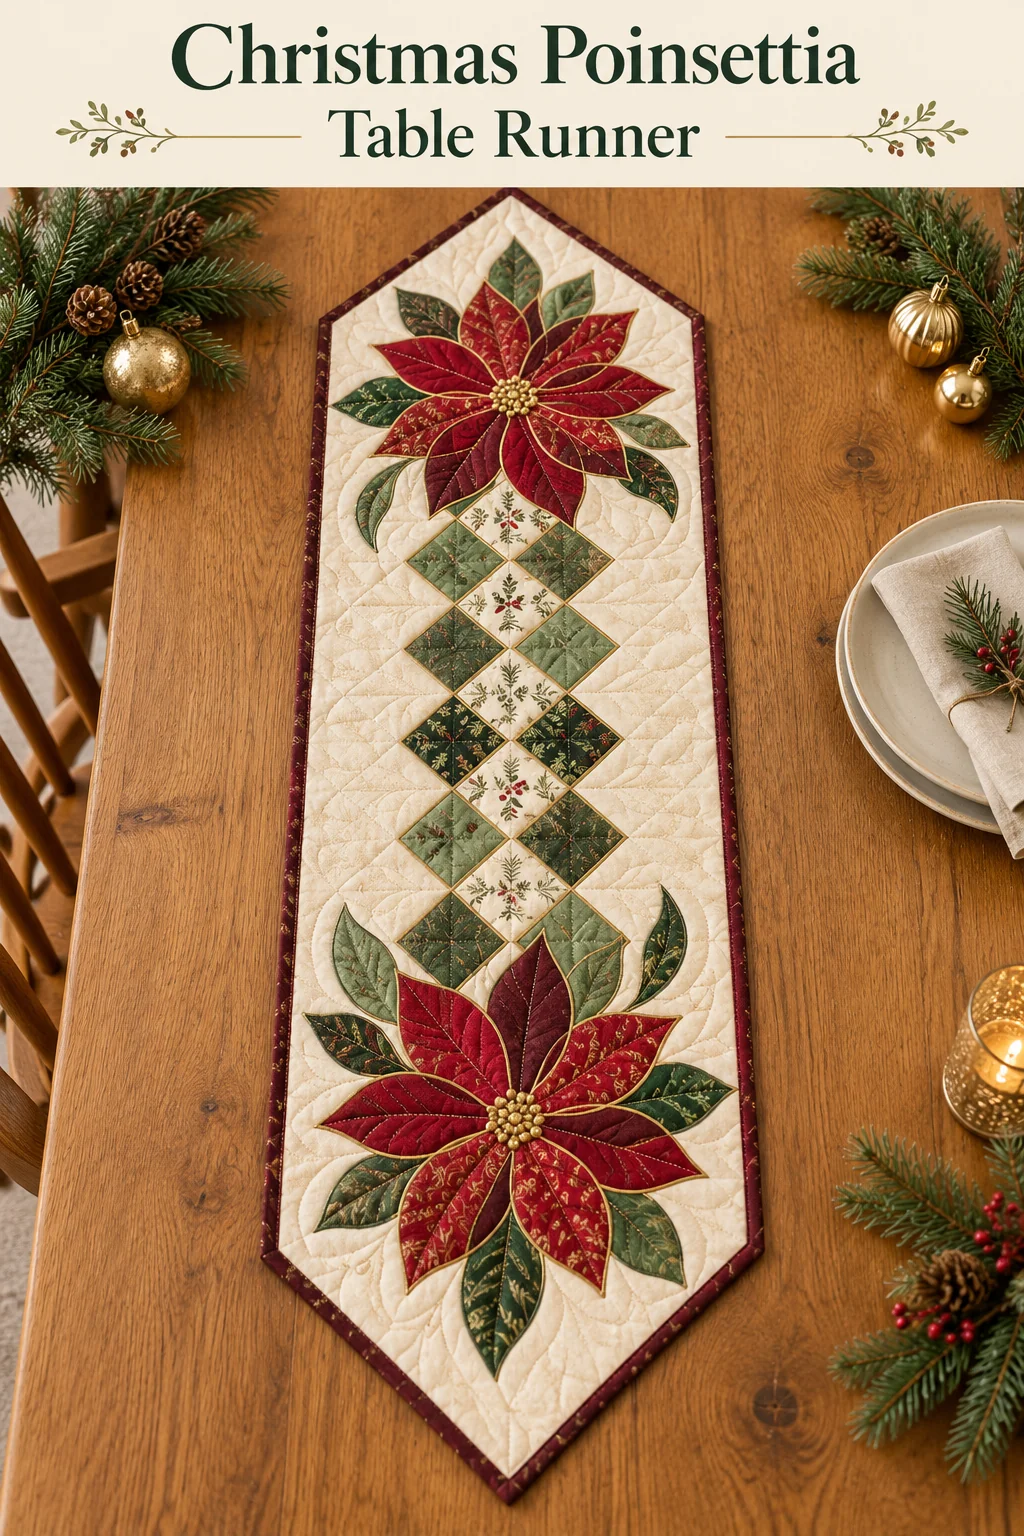
A handmade table runner brings color, texture, and a personal touch to a holiday table. This Christmas Poinsettia Table Runner combines an ivory background with red flowers, deep green leaves, and a long arrangement of gold-edged diamonds. Burgundy binding follows the pointed ends, giving the design a defined outline that looks lovely on a dining table, sideboard, or entryway console.
The contrast is what makes this project especially appealing. Soft sage tones bring a little lightness to the traditional red-and-green palette, while cream holiday prints keep the center from looking too dark. Gold fabric outlines each diamond and flower shape, helping the individual pieces remain distinct even when several prints are used together.
The free PDF available near the end of this article includes the cutting information, placement chart, assembly instructions, and printable applique templates for a photo-inspired version of the runner. Its approximate finished size is 15 × 48 inches (38.1 × 121.9 cm).
A Holiday Design Built with Applique
Although the center resembles pieced patchwork, this version uses fusible raw-edge applique on one continuous background. Each colored square sits on a slightly larger gold square, and the layered units are arranged on point. This creates the gold-edged lattice without requiring narrow strips to be sewn between small bias-edged pieces.
The flowers use the same layering idea. Larger gold shapes form the outlines beneath green leaves, burgundy back petals, and red front petals. A gold circle finishes the center. The effect depends on careful placement and neat edge stitching rather than complicated piecing seams.
This construction is suitable for a confident beginner who is comfortable with accurate cutting, fusible web, and basic machine applique. It is also a satisfying smaller project for an experienced quilter who enjoys working with seasonal fabrics. There are many edges to stitch, so allow yourself time to complete the applique in several relaxed sessions.
Choosing Fabrics for a Balanced Christmas Palette
Start with an ivory background that lets the shapes stand out. A solid or subtle tone-on-tone fabric gives the eye somewhere to rest between the busy holiday prints. Choose a background with enough body to support the applique, but avoid upholstery-weight materials that would make the finished runner difficult to quilt.
For the center, combine a dark green solid or near-solid, a soft sage fabric, a cream holiday print, and a darker festive print. Small-scale holly, berries, poinsettias, or winter foliage work well because the individual colored squares are only 1 3/4 inches before placement. Very large motifs may become difficult to recognize once cut.
Choose red and burgundy fabrics that are visibly different from one another. The darker back petals help create depth behind the brighter red petals. A warm gold quilting cotton provides the outline without the handling challenges that some metallic fabrics introduce. Check the arrangement in ordinary daylight before committing to the final combination.
Understanding the Diamond Layout
The runner contains 61 layered diamonds arranged in seven staggered columns. The center column has seven dark green units. Moving outward, the two sage columns contain eight units each, the cream-print columns contain nine each, and the outer dark-print columns contain ten each. This stepped arrangement makes room for a flower at each end.
The gold squares are cut at 2 inches, and the colored squares are cut at 1 3/4 inches. Centering the smaller square leaves a 1/8-inch gold border along each edge. Because these are raw-edge applique pieces, there is no added seam allowance. The PDF provides exact center coordinates so the arrangement can be marked with a ruler instead of estimated from a photograph.
A dry layout is an essential part of the process. Position the entire lattice and both flowers before permanently fusing the pieces. Check the spacing, balance the prints, and decide how directional motifs should face. A table runner may be viewed from either end, so alternating those motifs can make the design feel more balanced.
Making the Layered Poinsettias
Each flower begins with three green leaves, followed by five burgundy petals and five red petals. The gold outer shapes sit beneath their smaller colored counterparts. Working from the back layers toward the front keeps the overlaps organized and lets the brighter petals become the focal point.
The PDF includes actual-size petal and leaf templates plus a flower placement guide divided into four printable tiles. Print those pages at 100% or Actual Size, then measure the calibration square before tracing. A printer setting such as Fit to Page can change the templates enough to affect the final placement.
Use a nonstick applique pressing sheet to assemble a flower over the guide, following the directions for both the sheet and the fusible web. Let the layers cool before lifting them. Once the flower is positioned on the background, secure every visible raw edge with a narrow zigzag or blanket stitch. Fusible web holds the arrangement during construction; stitching gives the edges a more durable finish.
Quilting and Binding the Pointed Ends
Light quilting in the ivory spaces can add texture without competing with the applique. Follow the channels between the diamonds and add gentle echo lines around the flowers. Keep the quilting reasonably consistent across the runner and follow the batting manufacturer’s guidance on maximum spacing between quilted lines.
The background stays slightly oversized during applique and quilting. Afterward, the layers are trimmed to the marked six-sided outline. This helps preserve the shape while the fabric is handled and gives a clean edge for binding. Check that the applique remains safely inside the trimming line before cutting.
Burgundy bias binding finishes the silhouette. Take particular care at the four shoulder corners, which have a wider angle than the two pointed ends. Fold the binding to follow each actual angle, and arrange the back folds neatly before securing them. A sample corner made with leftover batting and fabric can make this step easier to understand.
Small Details That Improve the Finish
Test the applique method on scraps before preparing the complete set. Two layers of fabric and fusible web can become stiff if the adhesive is too heavy. A lightweight product, a fresh needle, and a supported work surface help keep the runner flexible and the stitching even.
Dark red and green fabrics deserve a colorfastness check before they are combined with ivory. Choose washable materials if the runner will be used on a dining table, and keep any optional center embroidery flat. The finished piece is decorative rather than heatproof; use suitable protection beneath hot dishes.
Download the Free Christmas Poinsettia Table Runner PDF
The 13-page printable pattern includes material quantities, cutting dimensions, a background shaping guide, the complete diamond placement chart, applique instructions, quilting and binding guidance, actual-size templates, and a tiled flower placement guide.
Christmas Poinsettia Table Runner Pattern + Free PDF
This is a reconstruction inspired by the reference photograph, with its own specified dimensions and applique shapes. The measurements and counts have been checked digitally, but the project has not been physically test-sewn. Follow the PDF diagrams as the construction reference and make a sample before cutting the full set. Any styled cover image serves as visual inspiration rather than a cutting or placement diagram.
The Christmas Poinsettia Table Runner brings together the detail of layered applique and the rhythm of repeated diamonds. Its gold outlines, contrasting petals, and pointed ends give the project a festive finish while leaving plenty of room for personal fabric choices. Whether you make it for your own home or as a thoughtful handmade gift, take the project one section at a time and enjoy watching the design come together.