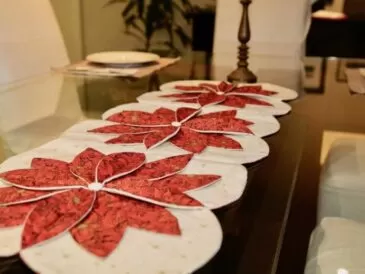
A Christmas swirl table topper brings movement and warmth to a holiday setting. In the photographed piece, red prints and dark green florals sweep around a small central star, while broad cream areas give the design room to breathe. The circular outline gathers those details into one striking centerpiece.
The color palette feels familiar, but the arrangement gives it personality. Gingham, narrow stripes, tiny florals, and richly colored red prints sit together without making the whole piece feel crowded. Repeating the colors around the circle helps the individual fabrics feel like part of the same design.
This is the kind of quilted accent that can become a favorite part of decorating each year. It works as a focal point on its own, and its round shape offers a change from a rectangular runner. Let the patchwork remain visible when styling it so the star and sweeping points can be appreciated.
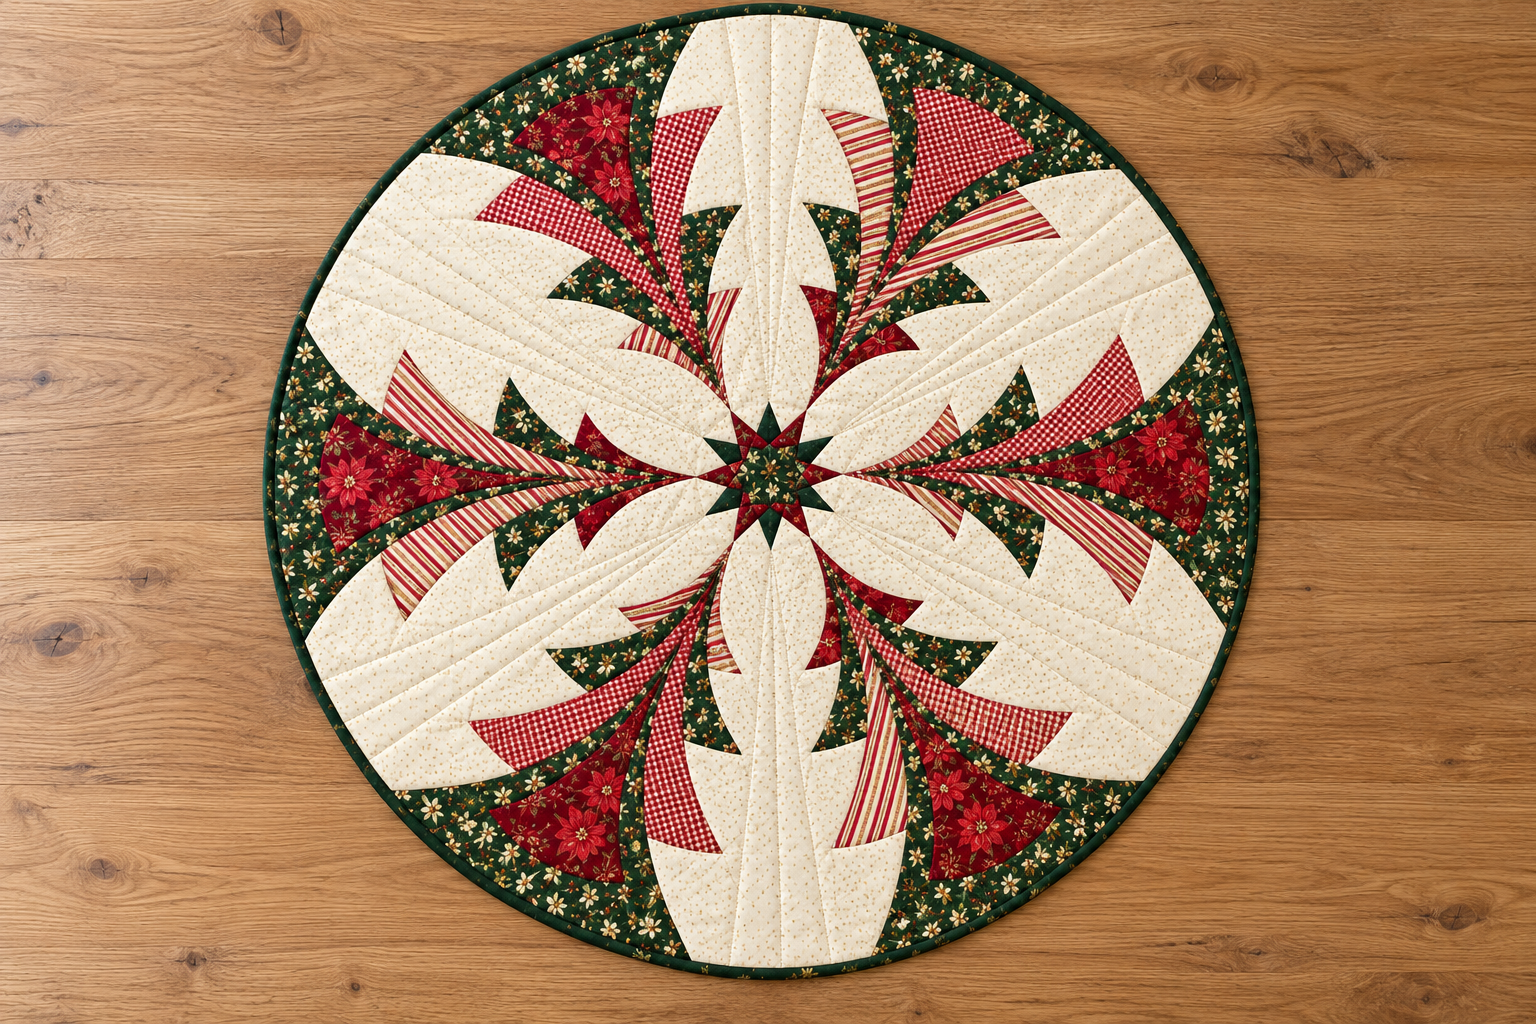
The photograph shows six repeated groups of pointed shapes arranged around the center. Their changing sizes and angles create the impression of a swirl. The cream spaces between them are just as important as the printed pieces: they separate the groups and make the movement easier to see.
At the center, a layered star gathers the surrounding colors into a smaller, concentrated detail. A narrow dark green binding then provides a clear outline around the outside. Those two features give the eye somewhere to begin and somewhere to finish as it moves across the patchwork.
The quilting is also part of the appeal. Lines of stitching are especially visible in the light fabric, adding texture to areas that might otherwise look plain. From a distance, the color arrangement catches the eye; up close, the fabric prints and stitching provide a second layer of interest.
Choosing red, green, and cream fabrics
Start with the cream background. A quiet tone-on-tone print or a small, subtle texture can work well because it leaves the pointed shapes easy to recognize. If the background is too busy or too close in value to the colored prints, the swirl may become harder to read.
For the reds, consider a small selection with different patterns but a shared color family. A gingham, a narrow stripe, and a richer red floral can give the topper variety. Lay the fabrics beside one another before cutting; the goal is for each print to contribute something without making one section look unrelated to the others.
The green fabric in the reference has a dark ground and small floral details. That combination adds depth while repeating the Christmas palette. When choosing an alternative, look at how the print appears in a small area as well as across a folded length of fabric. A beautiful large-scale print may read quite differently once it is divided into narrow pieces.
Directional prints deserve a little planning. Stripes can emphasize movement, but their direction will change as units rotate around a circular design. Use the confirmed placement diagram to decide where those changes belong. Do not assume that every striped piece should face the same direction on the fabric.
Supplies to gather before starting
The final quantities must come from the pattern for the diameter you intend to make. For planning your sewing space, gather:
- Cream or ivory background fabric.
- Coordinating red fabrics in a few print styles.
- A dark green print and a coordinating binding fabric.
- Backing fabric and batting suitable for the project.
- Piecing thread and quilting thread in colors that suit the fabrics.
- A rotary cutter, cutting mat, ruler, pins or clips, and an iron.
- The complete pattern, including any full-size templates, scale checks, and assembly diagrams it requires.
Keep a small fabric swatch beside each label used in the pattern. When several reds or greens are similar, this makes it easier to keep their positions consistent. A photograph of the planned layout can also help you notice an accidentally reversed or misplaced unit before it is sewn into a larger section.
Understand the pattern before cutting
A photograph is an excellent color and styling reference, but it cannot establish the original cutting sizes or the seam allowances hidden inside the quilt. Read the complete instructions before deciding which shapes to cut and how to join them.
Check whether the pattern uses ordinary piecing, foundation paper piecing, curved seams, applique, or a combination of methods. The appearance of a finished point does not tell you which construction method produced it. Follow the method and template conventions supplied with the actual pattern rather than treating every visible shape as an independent cutting piece.
If the pattern has printable templates, use its specified print setting and measure the calibration mark before making copies. Also confirm whether each outline is a cutting line or a finished sewing line. Adding an allowance twice, or leaving one out, changes the size of a repeated unit and can affect the entire circular assembly.
Make and measure the sample unit recommended by the pattern before cutting all the fabric. For a design with repeated sections, that early check is more useful than discovering a size discrepancy after every section has been sewn. Keep the checked sample near the machine as a reference while working through the remaining units.
Keep the layout organized as you sew
Lay out the sections in their intended circular order before joining them. Look at the direction of the points, the distribution of the red prints, and the shape of the cream areas. Checking all three together helps preserve the movement that makes this design distinctive.
Work through the assembly in the order given by the pattern. Press each completed stage as directed, and allow it to lie flat before measuring it. If a section does not match its intended size or shape, review that section before continuing to the next stage.
Keep the central star placement in view as well. Its position is an important part of the overall balance. The complete pattern should explain whether it is built into the piecing or added separately; the photograph alone is not enough to confirm that detail.
Quilting and finishing ideas
When planning the quilting, consider which parts of the patchwork you want to emphasize. The light areas offer space for visible stitching, while quieter quilting in the printed sections can allow the fabrics to remain the focus. A thread close to the background color gives a different effect from a contrasting thread, so test the look on a layered scrap first.
Follow the batting manufacturer’s guidance for quilting distance. Choose a quilting arrangement that supports the layers throughout the piece, including areas that may receive less attention because the fabric print is busy. A small sample made with the same fabric, batting, thread, and needle can help you assess the texture before beginning the topper.
For the circular edge, follow the pattern’s binding instructions and any directions for preparing bias strips. The dark green finish shown in the reference creates a neat visual frame. Let the binding follow the curve smoothly, checking that the edge lies flat as you work.
For blog photographs, take one overhead view that shows the complete layout and another closer view of the quilting and prints. Soft daylight can reveal the texture without making the cream fabric look overly bright. Accurate color is especially useful when readers are comparing fabrics for their own version.
Whether you enjoy traditional Christmas prints or a simpler combination of coordinating solids, this Christmas swirl table topper offers plenty of color inspiration. Preserve the contrast between the light background and the darker pointed shapes, then let the confirmed pattern guide the measurements and construction.