A holiday table feels welcoming when the useful details are as thoughtfully chosen as the decorations. This Christmas Cup Keeper sewing pattern brings those details together with a quilted holder for a nested stack of empty cups. Its tall, rounded back, scooped front, gathered ruffle and plaid bow give an everyday serving item a cheerful place on the table.
The red and green versions in the photograph offer two lovely ways to coordinate the project. An ivory holiday print connects them, while contrasting linings and matching ruffles give each keeper its own character. Make one for a drinks station or sew a pair for different cup sizes.
The downloadable PDF is available near the end of this article, before the conclusion. It includes drafted measurements, assembly diagrams and printable templates to guide you through the project.
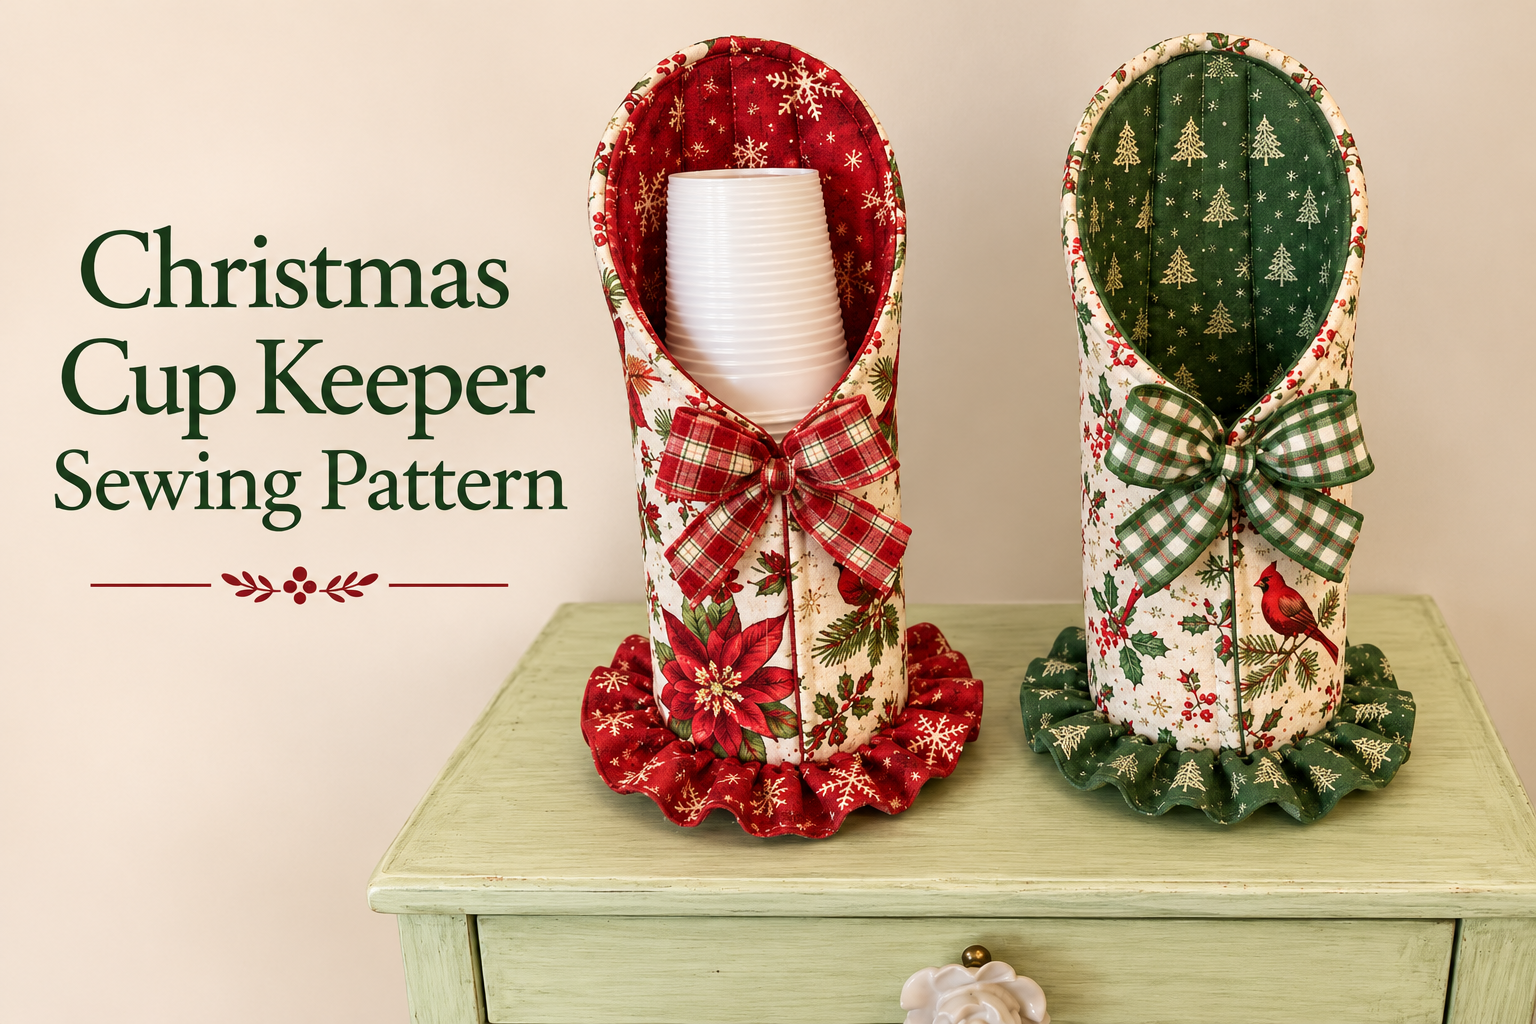
The shape is what makes this cup keeper distinctive. The back rises above the cup stack, showing off the lining fabric, while the lower front leaves room to grasp the top cup. A circular floor supports the stack, and the ruffle spreads around the base to create a soft, decorative edge.
The front bow brings the fabrics together and covers part of the center-front seam. Before sewing it in place, check that its loops and tails leave the cups easy to reach. That small adjustment helps the finished keeper work comfortably on a busy serving table.
Choose Fabrics That Make the Details Stand Out
For a traditional Christmas look, begin with an ivory cotton printed with poinsettias, holly, evergreen branches or cardinals. Choose one of its accent colors for the lining and ruffle. Red snowflakes create a lively combination, while green fabric with small Christmas trees gives the same shape a quieter woodland feel.
Consider the scale of each print. The body offers room for a larger floral motif, but the lining, ruffle and bow benefit from smaller designs. A plaid bow adds definition without needing to repeat the main print.
The lining is clearly visible inside the tall opening, so treat it as part of the design. Lay your fabrics together before cutting and fold a little of the lining over the outer print to preview the contrast.
Sample Size and Finished Proportions
The accompanying PDF develops the photographed idea into the following sample size:
| Feature | Inches | Approximate metric |
|---|---|---|
| Back height | 14½″ | 36.8 cm |
| Front lip height | 7½″ | 19.1 cm |
| Base diameter at the seam | 5″ | 12.7 cm |
| Ruffle projection beyond the seam | 1½″ | 3.8 cm |
| Overall ruffled footprint | About 8″ | 20.3 cm |
These are the drafted dimensions for the downloadable version. They give you a starting point that you can check against the cups you plan to use.
Measure Your Cup Stack First
Measure both the widest rim and the height of the nested stack. The sample is intended as a starting point for rims up to about 4 inches wide, allowing for the thickness of the structural foam.
With the sample’s 7½-inch front lip, a stack at least 9 inches high leaves approximately 1½ inches of the top cup exposed. If your stack is shorter, lower the front opening during the paper fitting stage or use a stable removable riser inside the keeper.
The PDF includes adjustment guidance for changing the diameter and height. Make those changes to the drafted pieces while keeping the construction seam allowance at ¼ inch. Enlarging the entire PDF changes the seam allowances too, so a size adjustment needs a redrafted outline.
Materials and Structure
Quilting cotton works well for the outer fabric and lining. For one keeper, the guide allows ½ yard of outer fabric and ⅝ yard of lining fabric, including the matching ruffle, based on at least 40 inches of usable fabric width.
Firm 3 mm bag foam provides support for the tall back. The body is quilted as a sandwich of outer fabric, foam and lining, which holds the layers together and creates the vertical stitched texture seen in the reference.
You will also need a flexible base insert, true-bias binding, thread and fabric or ribbon for the bow. Check the full supply list before cutting, especially if you are making two keepers.
How the Keeper Comes Together
The construction begins with an oversized quilted panel. Stitching the layers before cutting the final shape allows you to trim away any small amount of shrinkage from quilting.
Next, assemble the four body-template sheets and place the half pattern on the center-back fold. Once unfolded, the shaped piece has a tall middle and two lower front edges. Joining those front edges forms the tube.
The ruffle is made separately by joining a long strip into a ring, folding it lengthwise and gathering its raw edges. Quarter marks help distribute the gathers evenly around the body.
The circular floor then secures the bottom and traps the ruffle between the outer fabric faces. After the inside seam is finished, turning the keeper right side out releases the ruffle around the base. Bias binding finishes the curved opening, and the bow completes the front.
Work through these stages in order, checking the diagrams for fabric direction and layer placement. The circular base and curved binding reward careful pinning and a steady sewing pace.
Small Details That Improve the Finish
Mark the quilting lines before stitching and work outward from the center of the panel. Keep the fabric flat as you sew so that the lining and outer print feed evenly.
Distribute the ruffle gathers before attaching the floor. Look around the entire ring and move any dense clusters into thinner areas. This helps the finished ruffle spread evenly.
At the opening, ease the bias binding around the curve without pulling it tight. Check that your stitching catches both folded edges. Finally, position the bow with the actual cups in place, then hand-stitch it securely.
Download the Christmas Cup Keeper Sewing Pattern PDF
The free PDF brings the measurements and construction information together in one illustrated guide. Its 15 pages include:
- A materials list and cutting measurements.
- Body, ruffle, circular-base and bow instructions.
- Assembly diagrams and guidance for adjusting the size.
- Four full-size body-template sheets.
- Base-circle templates and printing-scale checks.
Print the template pages at 100% or Actual size and measure the 1-inch calibration square before using them. Trim the body tiles on their frames, butt the matching edges without overlap and tape them together.
Christmas Cup Keeper Sewing Pattern PDF
Pattern note: this guide is an independent reconstruction from a reference photograph, with proposed measurements, and has not been tested as a sewn sample. Begin with the paper fit check, then make one fabric keeper before cutting a larger batch.
A Christmas cup keeper adds a handmade detail to a drinks station while giving a stack of cups a clear place on the table. Coordinated lining, an evenly gathered ruffle and a well-placed bow make the simple fabrics feel special.
Choose the prints you enjoy, check the fit with your cups and take your time around the curved base and opening. The finished design can become a cheerful part of your holiday serving setup, ready to bring out with the table linens each year.