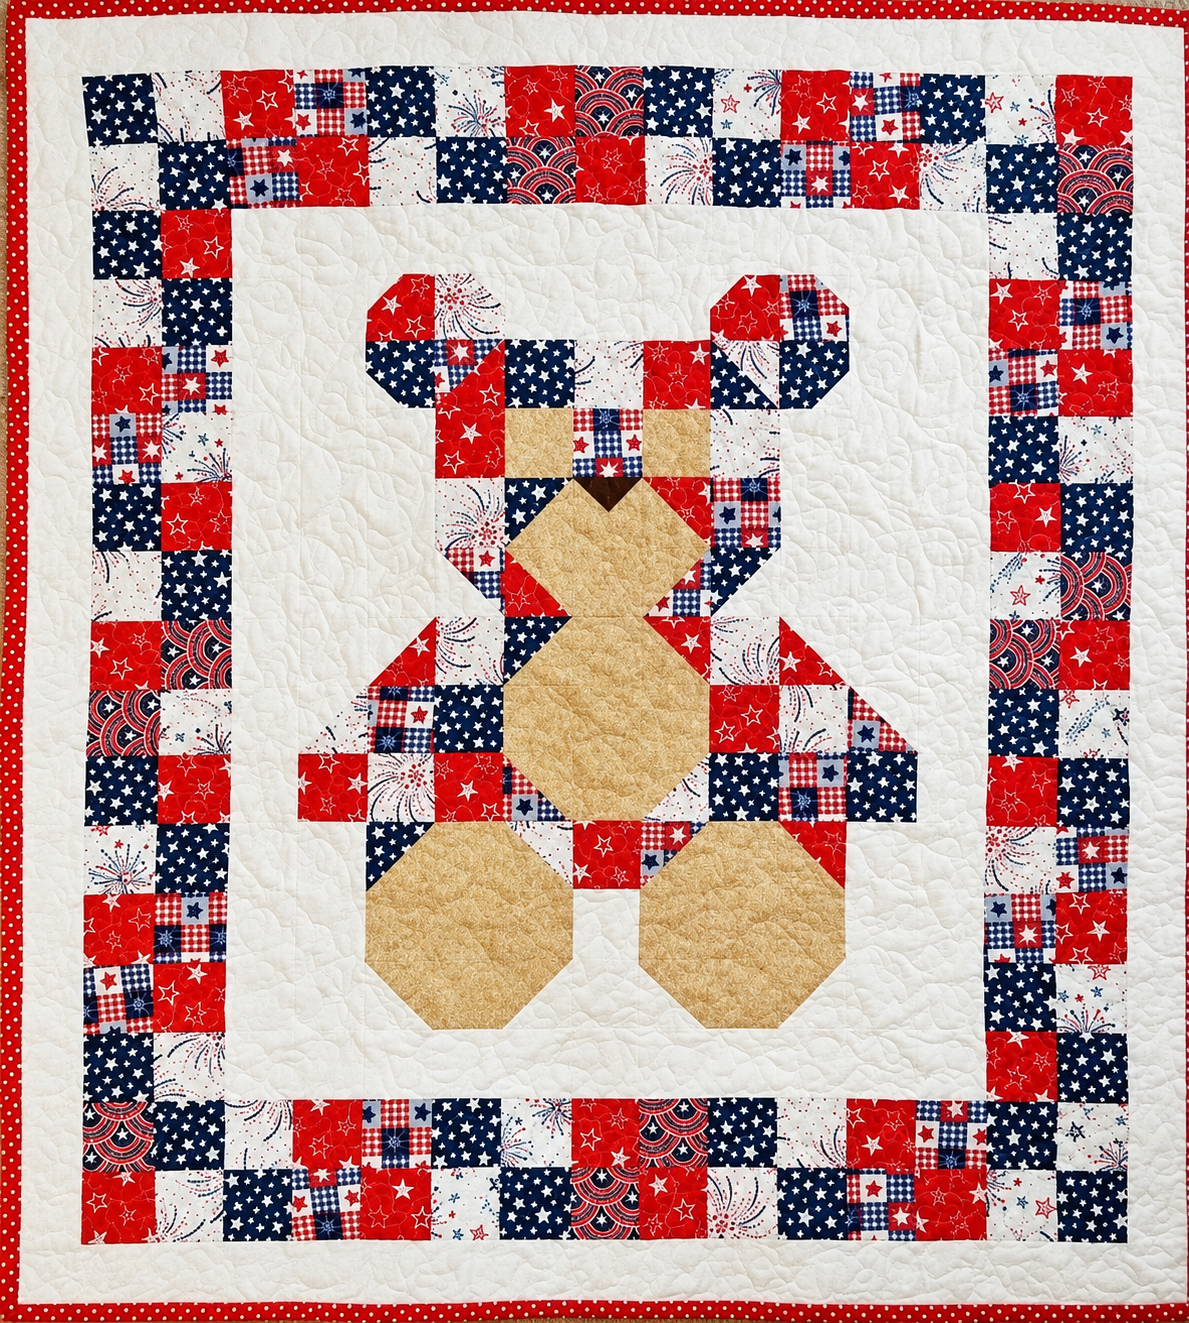
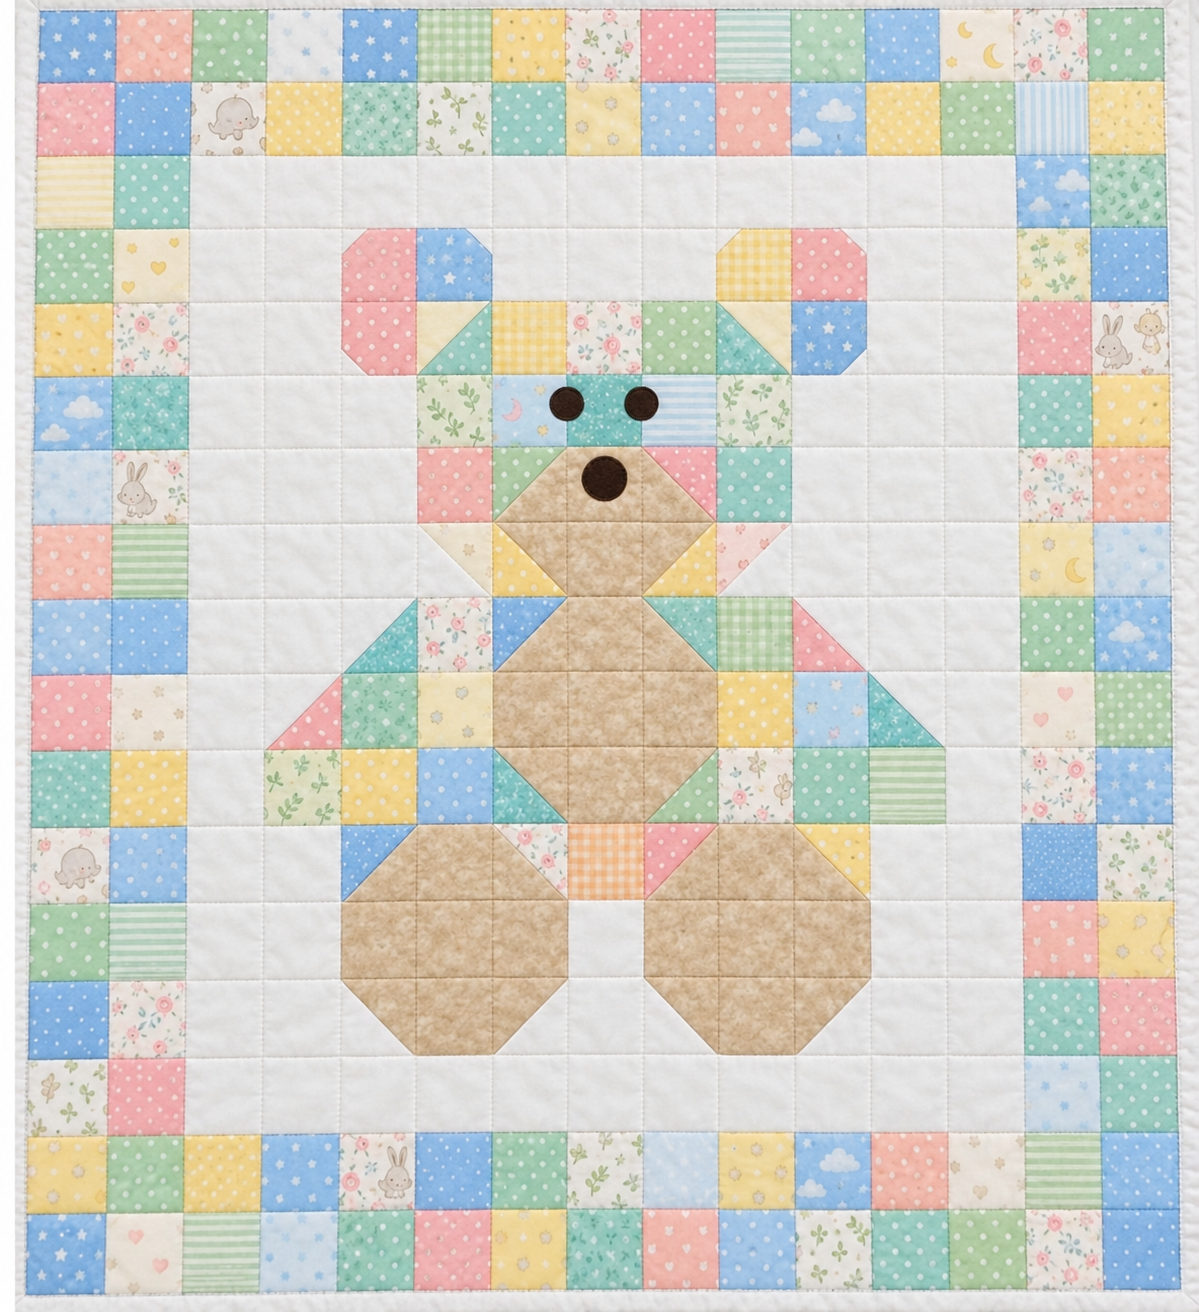
This adorable Teddy Bear Quilt is a sweet and cozy project that brings charm to any nursery, child’s room, or handmade gift collection. Built on a simple 4-inch grid, the design combines squares and half-square triangles to form a lovable patchwork teddy bear surrounded by soft background fabrics and framed with coordinated borders.
The pattern is a wonderful project for quilters who enjoy pictorial quilts without needing highly complicated piecing. With warm browns, soft creams, and gentle background tones, the finished quilt has a timeless look that works beautifully for baby gifts, children’s décor, or keepsake quilting.
Finished Size
Approx. 48″ x 56″
Skill Level
Confident Beginner to Intermediate
Quilt Structure
- Center panel: 9 x 11 grid
- Finished unit size: 4″ x 4″
- Unfinished unit size: 4 1/2″ x 4 1/2″
- Inner border: 2″ finished
- Outer border: 4″ finished
Size Breakdown
- Center panel: 36″ x 44″
- Add inner border: 40″ x 48″
- Add outer border: 48″ x 56″
Materials
Fabrics
You may use a scrappy mix within each color family.
Bear Fabrics
- Dark Brown – ears, paws, shadow areas
- Medium Brown – head, arms, outer body
- Light Brown / Tan – body shaping
- Cream / Pale Beige – muzzle, tummy, feet
Background Fabrics
- White / White print
- Very light gray
- Soft gray print
Borders
- Inner Border: light gray
- Outer Border: novelty or floral print border fabric
Additional Supplies
- 1/4″ presser foot
- Rotary cutter, ruler, mat
- Neutral piecing thread
- Batting approx. 54″ x 62″
- Backing approx. 56″ x 64″
- Binding: 1/2 yard
Fabric Estimates
These estimates allow a little extra for trimming and layout adjustments.
- Dark Brown: 1/4 yard
- Medium Brown: 3/8 yard
- Light Brown / Tan: 1/4 yard
- Cream / Pale Beige: 1/4 yard
- Assorted Backgrounds: 3/4 yard total
- Inner Border Fabric: 3/8 yard
- Outer Border Fabric: 3/4 yard
- Binding: 1/2 yard
- Backing: 3 yards
Cutting Instructions
1) Basic Grid Units
Cut squares for a 4″ finished grid, so each square should be cut at:
- 4 1/2″ x 4 1/2″
Cut an assortment of:
- Background squares
- Brown squares
- Cream squares
- Tan squares
Because this quilt is pictorial and scrappy, it is best to cut more 4 1/2″ squares than needed in each color family and arrange them on a design wall before sewing.
A good starting point is:
- Background (all light prints combined): 40 squares
- Dark Brown: 8 squares
- Medium Brown: 18 squares
- Tan / Light Brown: 16 squares
- Cream / Pale Beige: 17 squares
2) Half-Square Triangles (HSTs)
Several parts of the teddy bear are shaped with diagonal units.
To make 4″ finished HSTs:
- Cut two contrasting squares at 5 1/4″ x 5 1/4″
- Draw a diagonal line on the back of the lighter square
- Sew 1/4″ on each side of the line
- Cut on the drawn line
- Press
- Trim to 4 1/2″ x 4 1/2″
Make assorted HSTs using:
- Background + Medium Brown
- Background + Dark Brown
- Background + Tan
- Background + Cream
- Medium Brown + Tan
- Tan + Cream
Prepare at least 24 HST units in total.
Color Guide
You can label your fabrics as follows:
- A – Dark Brown
- B – Medium Brown
- C – Tan
- D – Cream
- E – White / White Print
- F – Light Gray
- G – Soft Gray Print
- H – Inner Border
- I – Outer Border
Unit Construction Overview
The teddy bear image is built in sections:
- Ears
- Head
- Muzzle
- Upper body / shoulders
- Arms
- Tummy
- Legs
- Feet
Work on a design wall if possible.
Center Panel Layout
The center panel is assembled as a 9 x 11 unit grid.
Below is the easiest construction method: build the quilt in horizontal rows.
Row 1
Create the top row using mostly background squares, with angled brown units forming the tops of the ears.
Suggested composition:
- Background squares on the outer edges
- HSTs or brown squares to begin the ear shapes
- Light background across the top of the head area
Row 2
This row continues both ears and begins the upper head.
Use:
- Brown and dark brown units for the ear curves
- Background units between and around the ears
- Begin shaping the head with medium brown units
Row 3
This row forms the upper head and starts the face.
Use:
- Medium brown squares
- HSTs to soften the head outline
- Background units on the outside edges
Row 4
This row defines the bear’s face and upper muzzle.
Use:
- Medium brown around the outside
- Cream or pale beige in the center for the muzzle
- One or two darker accent units for the nose / face emphasis if desired
Row 5
This row connects the head to the shoulders and upper arms.
Use:
- Medium brown and tan pieces
- Background around the bear silhouette
- Keep the center lighter so the tummy transition looks natural
Row 6
This row builds the shoulders and the upper body.
Use:
- Broader medium brown areas on both sides
- Lighter cream / tan in the center
- This row should clearly widen the bear’s shape
Row 7
This row creates the middle body and tummy.
Use:
- Tan and cream in the center
- Medium brown on the sides
- This is one of the widest body rows
Row 8
This row begins the lower body and tops of the legs.
Use:
- Medium brown on outer sides
- Cream / tan in the center
- HSTs where needed to taper the body
Row 9
This row shapes the upper legs.
Use:
- Brown and tan units on both left and right sides
- Cream units in the central lower body
- Background units between the legs if visible in your layout
Row 10
This row forms the feet.
Use:
- Large cream or pale beige sections for both feet
- Tan units to blend into the legs
- Background units around the feet
Row 11
This bottom row finishes the feet and lower background.
Use:
- Background units across the bottom outer areas
- The lower portions of the feet in cream / tan
- Keep the silhouette soft and balanced
Suggested Visual Placement Guide
To recreate the image more accurately, follow this silhouette logic:
Ears
- Place them high and slightly outward
- Use darker browns on the outer ear sections
- Tan or medium brown can soften the inner ear area
Head
- Rounded top
- Slightly wider than the muzzle
- Use medium brown as the main head color
Muzzle
- Centered
- Cream or pale beige
- Diamond or softly angular shape
Body
- Slightly tapered from shoulders to lower belly
- Cream center for the tummy
- Brown framing on the sides
Arms
- Positioned diagonally downward from the shoulders
- Made with medium brown and tan units
- Should appear rounded, not stiff
Legs and Feet
- Legs angle outward slightly
- Feet are rounded and lighter in color
- Cream / pale beige works best for the paws
Assembly Instructions
Step 1
Cut all squares and HST pieces.
Step 2
Make all HSTs and trim them to 4 1/2″ square.
Step 3
Lay out the full 9 x 11 center panel on a design wall or flat surface.
Step 4
Adjust the placement until the teddy bear shape is balanced and symmetrical.
Step 5
Sew units together into rows.
Each row should contain 9 units.
Step 6
Press seams in alternating directions row by row.
Step 7
Join all 11 rows to complete the center panel.
Borders
Inner Border
Cut:
- 2 strips 2 1/2″ x 36 1/2″
- 2 strips 2 1/2″ x 48 1/2″
Attach:
- Side borders first
- Top and bottom borders second
This creates a narrow frame around the teddy bear panel.
Outer Border
Cut:
- 2 strips 4 1/2″ x 40 1/2″
- 2 strips 4 1/2″ x 56 1/2″
Attach:
- Side borders first
- Top and bottom borders second
This finishes the quilt at approximately 48″ x 56″.
Backing and Batting
- Batting: 54″ x 62″
- Backing: 56″ x 64″
Layer:
- Backing (wrong side up)
- Batting
- Quilt top (right side up)
Baste using pins, spray, or thread-basting.
Quilting Suggestions
This design looks beautiful with:
- Outline quilting around the teddy bear
- Meandering or loops in the background
- Straight-line quilting through borders
- Soft curves in the body to enhance the plush toy effect
You may also quilt around the muzzle, tummy, and paws to make the bear stand out.
Binding
Cut binding strips:
- 2 1/4″ wide, enough to make approximately 210″ of binding
Join strips, press in half lengthwise, and bind as usual.
Helpful Tips
- Keep a 1/4″ seam allowance throughout
- Trim HSTs accurately
- Use a design wall for final placement
- If your bear looks too narrow, widen the arm or body rows slightly
- If your bear looks too tall, reduce one background-heavy row near the middle
- A scrappy mix of browns adds warmth and depth
The Teddy Bear Quilt Pattern is a charming project that combines simple patchwork techniques with a playful pictorial design. Using squares, half-square triangles, and carefully arranged fabric values, the bear gradually comes to life while still keeping the construction approachable for quilters with basic piecing experience.
The Teddy Bear Quilt Pattern PDF
One of the nicest things about this pattern is how easily it can be personalized. You can use soft neutral fabrics for a classic nursery quilt, warmer browns for a traditional teddy bear look, or even brighter colors for a more playful version. Scraps, fat quarters, and coordinated fabric bundles can all work beautifully.
Take your time when arranging the blocks, especially the diagonal units that shape the ears, face, arms, and feet. A design wall or large flat surface can make it much easier to check the overall silhouette before sewing the rows together.
Once finished, this quilt makes a wonderful handmade gift for a baby shower, child’s bedroom, nursery, or family keepsake. With its cozy appearance and recognizable teddy bear motif, it is the kind of quilt that can be treasured for many years.