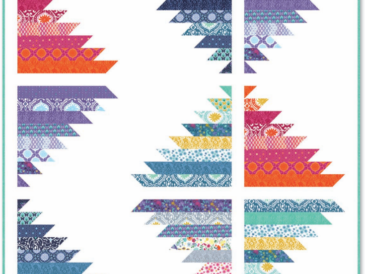
Look at a single tree in the Indigo Grove quilt and you’ll see little cream diamonds tucked among its blue branches. Those diamonds are part of the background. The shape comes from arranging one small blue triangle in two directions, with the tips meeting across a narrow gap. It’s a lovely detail to discover up close, especially if the tree is cut from an indigo print with a little movement of its own.
This 40″ × 52″ quilt features eighteen trees in seven staggered rows. Inspired by a photograph of a blue-and-cream tree quilt, the Quilt Missouri version uses raw-edge appliqué on a continuous cream background. The free guide at the end includes a full-size placement drawing, separate cutting templates, and a map for arranging the grove.
A print looks different in a tree crown than it does on the bolt. Each triangle measures just ¾″ across, so a white blossom in a blue floral could fill an entire triangle. To audition a fabric, cut a triangle-shaped window in a scrap of paper and slide it across the print. Check several spots, particularly if you’re considering a large floral for one of the pale trees.
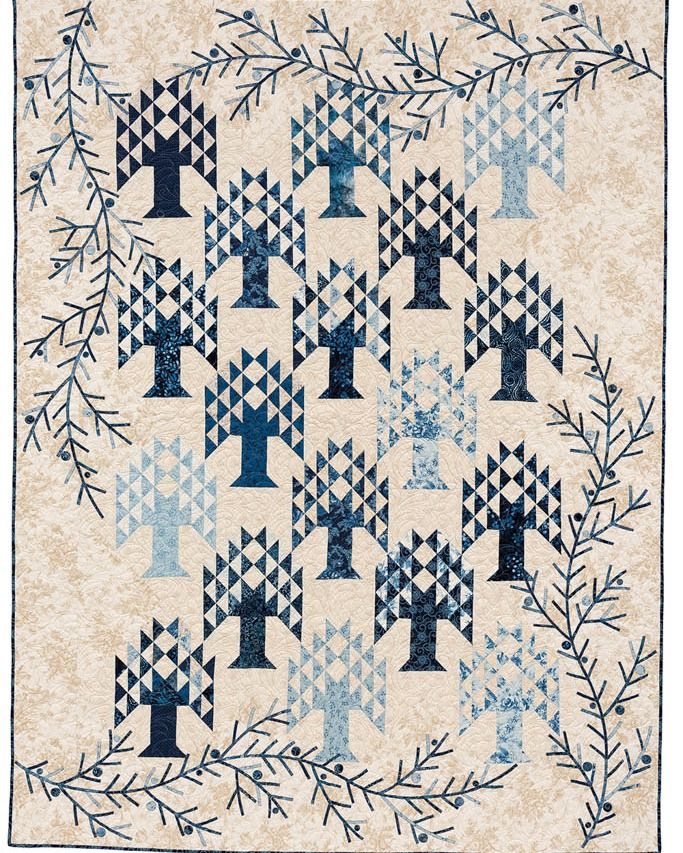
For a palette close to the photograph, gather midnight blue, teal, ice blue, medium blue, deep blue, and slate. Lay the palest swatch on your cream fabric and look at it from across the room. A soft outline is part of the charm here, but you should still be able to see the tree. A warm, lightly mottled cream gives the icy blues a little more definition.
Make one tree from trunk to tip
Print the template pages at actual size and measure the one-inch test square. For your first tree, choose a darker blue so it’s easy to see how the pieces fit. Set the trunk over the full-size drawing on a transparent appliqué pressing sheet. Then lay out the triangles in pairs, starting at the center and working toward the outer edges. The tips on the left half point right, and the tips on the right half point left.
Take a moment to look at the cream openings before touching the iron. If one diamond is noticeably smaller than its neighbors, an adjacent triangle may have slipped past its meeting point. A pair of tweezers helps with that tiny adjustment. Once the arrangement matches the drawing, follow the fusible manufacturer’s directions and secure the raw edges with a small blanket stitch or narrow zigzag.
When the grove is stitched, let one of its little trees find its way onto the quilt label. A leftover blue triangle above a few brown or navy stitches makes a tiny evergreen with just enough room beneath it for a name and date. If you’ve used fabric from a favorite shirt or an older quilt, add a line about where that blue came from. Years from now, someone turning back the corner will know which tree to look for.
Give the trees room to overlap
The first row holds three trees, the next holds two, and the same rhythm continues down the quilt. The base of a trunk sits in the space between two crowns in the row below. That overlap gives the grove its depth while leaving a little cream around each tree.
Try positioning the first two rows together before fusing anything to the background. Viewing those five trees as a group makes it easier to judge the distance between a dark trunk and the pale branches beneath it. The printable placement chart gives measurements from one fixed corner, so you can set each tree in place without accumulating small measuring errors from row to row.
Finish with slender branches and berries
The border grows directly out of the cream ground. To shape it, lay dark cotton cord along the marked branch paths and hold it in place with narrow zigzag stitches. Short twigs alternate from one side of a stem to the other. Leave a few bare and finish others with small blue berries. That variation gives the edges the loose, uneven spacing of a real branch.
For quilting, try a cream thread and a small leaf motif in one of the open spaces beside a trunk. Check the texture in side light before carrying it across the top. A narrow navy binding finishes the edge and picks up the color of the darkest trees.
Download the free Indigo Grove quilt guide
The eight-page guide includes fabric quantities, full-size appliqué templates, a color layout for all eighteen trees, and measured paths for the four border branches. Keep the placement drawing beside your pressing mat and the row chart with your background panel.
If you have a blue fabric with a fine stripe, try cutting a pair of triangles so the stripes slope down and away from the trunk on both sides. Lay them on a cream scrap and see how the lines lead your eye along each branch. A little piece of striped shirting can give one tree a character all its own, especially beside a tree cut from a quiet blue solid.
As you cut the pieces for each tree, tuck them into a paper envelope with a scrap of the print taped to the front. Pencil the tree’s row and position on the flap. Midnight and deep blue can look remarkably alike under a sewing lamp, and it’s much easier to check a swatch than to sort through a handful of tiny triangles halfway through a row.
Download the free Indigo Grove quilt guide
Save a few spare triangles for a stitching sample. Fuse one dark triangle and one pale triangle to a leftover strip of cream, then stitch around both with the thread you plan to use. Pay particular attention to the tips. If several stitches pile up at a point, practice stopping with the needle down and pivoting the fabric until you can turn the corner cleanly.