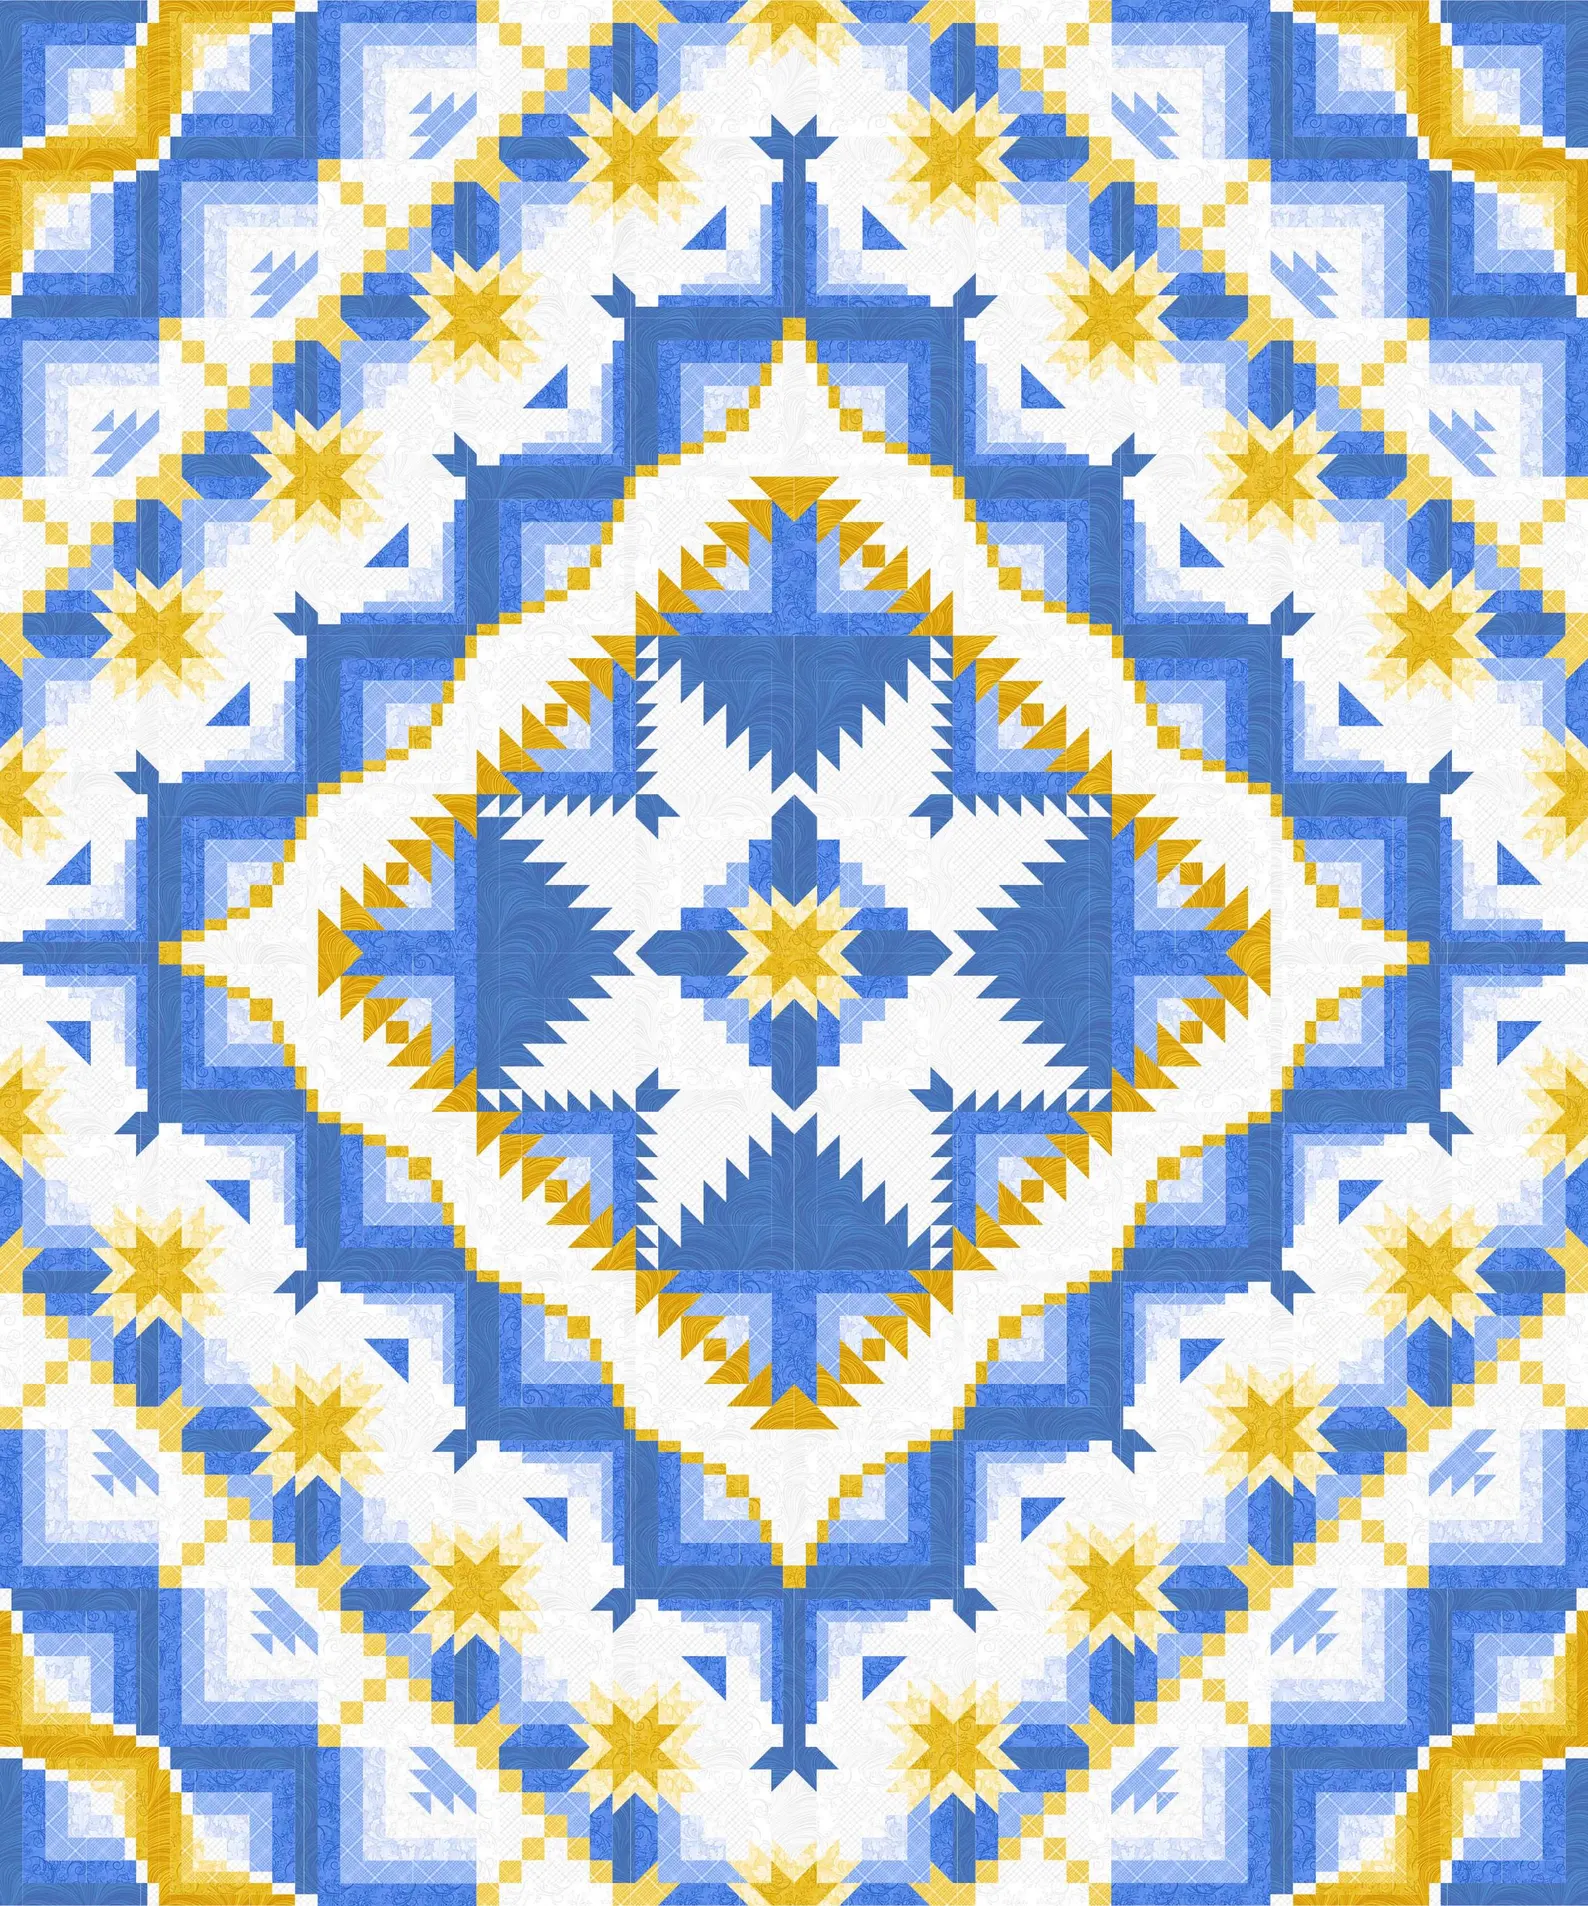
One of the best moments in making the Eureka! quilt comes when you lay four neighboring blocks on the table and see a gold star appear where their corners meet. On its own, each corner holds just a few triangles. Together, they explain how the stars travel around the blue medallion and why the direction of one little gold point matters.
This blue-and-gold version finishes at 87½″ × 105″, a double/queen quilt made with ten blocks across and twelve down. The Quilt Missouri guide at the end of this article is an independent interpretation of the Eureka! illustration. It includes the cutting plan and a color chart for each of the 120 block positions.
The deepest indigo is easy to pick out. The quieter decision is where the porcelain background ends and the first blue step begins. Set a small piece of ice blue on your background fabric and look at it from a few feet away. You want to see that first step even in the narrow places where only a sliver of blue shows. Then add sky, cornflower, and indigo in order. Squint at the four blues together and check that you can still pick out each one.
For the stars, the guide uses vanilla, straw, and marigold. Try folding a marigold swatch to a point and laying it on cornflower blue. That little tip is a better test of the pairing than two folded yards side by side. If you love a print, look for a fine sprig, dot, or tone-on-tone swirl that keeps its color when cut down to a small triangle.
Sew one block before cutting the full quilt
Start with the upper-left block, labeled A1 in the guide. Its seven rows of seven units give you a chance to check your cutting, pressing, and quarter-inch seam. Each unit should measure 1¾″ square when it goes into the row. After sewing the first seven together, press the row and measure it. It should be 9¼″ long and 1¾″ high. If that first strip comes up short, check the seam allowance now, while there are only six seams to revisit.
As you work farther into the quilt, you’ll meet chart squares marked with a P number. Each one has its own enlarged diagram and is made from four smaller pieces. Once sewn, it occupies exactly the same space as a plain square. Keep a tray for the 1⅛″ unfinished units that go inside these little four-patches. They’re easy to mix up with scraps during a long afternoon of trimming.
Let the star points guide the layout
Pin a paper label to the top edge of each completed block. The letter tells you the row, the number tells you the column, and the pin tells you which way is up when you carry the block from the ironing board. This matters most on the mirrored sides, where a turned block can look quite convincing on its own.
Before joining a row, lay it beside its neighbor and follow one gold diagonal with your finger. Where a star crosses a seam, fold the two blocks along the future stitching line and peek at the point. You can adjust the pin there before sewing the whole edge. As more rows come together, step back far enough to see the large blue diamond as well as the individual stars.
Quilting around the medallion
The stepped blue frames provide a natural route for a walking foot. Try echoing one frame, pivoting with the needle down at each change of direction. In the open porcelain areas, a pale thread lets the texture show without drawing a dark line across the gold points. For the binding, audition a narrow fold of indigo against a corner of the top. You’ll see how the finished edge looks beside both the deep blue steps and the gold patches that reach the perimeter.
Download the free Eureka! quilt guide
The 41-page printable guide includes the eight-color fabric list, cutting quantities, half-square triangle pairings, enlarged four-patch diagrams, and all 120 block charts in sewing orientation. Keep the full-quilt illustration handy as you piece. It shows where the little corner you’re sewing fits into the larger star.
Before basting, spread the pieced top over the bed where you plan to use it. Stand at the foot and look for the last gold star on either side of the blue medallion. On a deep mattress, those stars may fall just over the edge, where you can see them from the doorway. This is a lovely time to take a photograph of the top while you can still see every seam.
Save a handful of porcelain, indigo, and marigold scraps for a small quilting sample. Sew them together so that all three colors meet, then layer the patchwork with the batting and backing you’ve chosen. Stitch across the junction with two threads you’re considering. A soft blue that almost disappears on indigo can leave a surprisingly distinct line across a vanilla star point.
When you’re ready to quilt the full top, make room to the left of your machine for the weight of the quilt. An extra table set level with the machine bed helps keep those long blue steps moving smoothly under the walking foot. Before turning a corner, pause with the needle down and bring the next section of quilt up onto the table so its weight won’t pull the first stitch of the new line sideways.
For a small detail on the back, piece a strip from the four leftover blues, arranging them from ice blue through indigo just as they appear in the medallion. Add a single marigold square at one end and sew the strip beside your quilt label. Years from now, someone turning back that corner will find the colors of the whole quilt gathered beside the maker’s name and date.