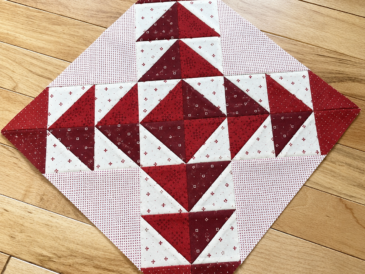
A bright diamond, slender triangles, and a few well-chosen colors give the Twinkle Block its lively character. Look at the center first, then follow the angled shapes around it. The repeated triangles and rotated corner units create movement within a square layout, making this a block that rewards a little time spent choosing fabrics.
Designed by Amarilys Henderson for Moda Blockheads 7, Twinkle is Block 2 in the series. It combines foundation paper piecing with familiar patchwork techniques and includes four finished size options. Whether you are adding it to a sampler or planning a project around one striking block, the pattern gives you room to explore color and scale.
You will find the pattern PDF at the end of this article, including the cutting chart, assembly diagrams, and foundation templates.
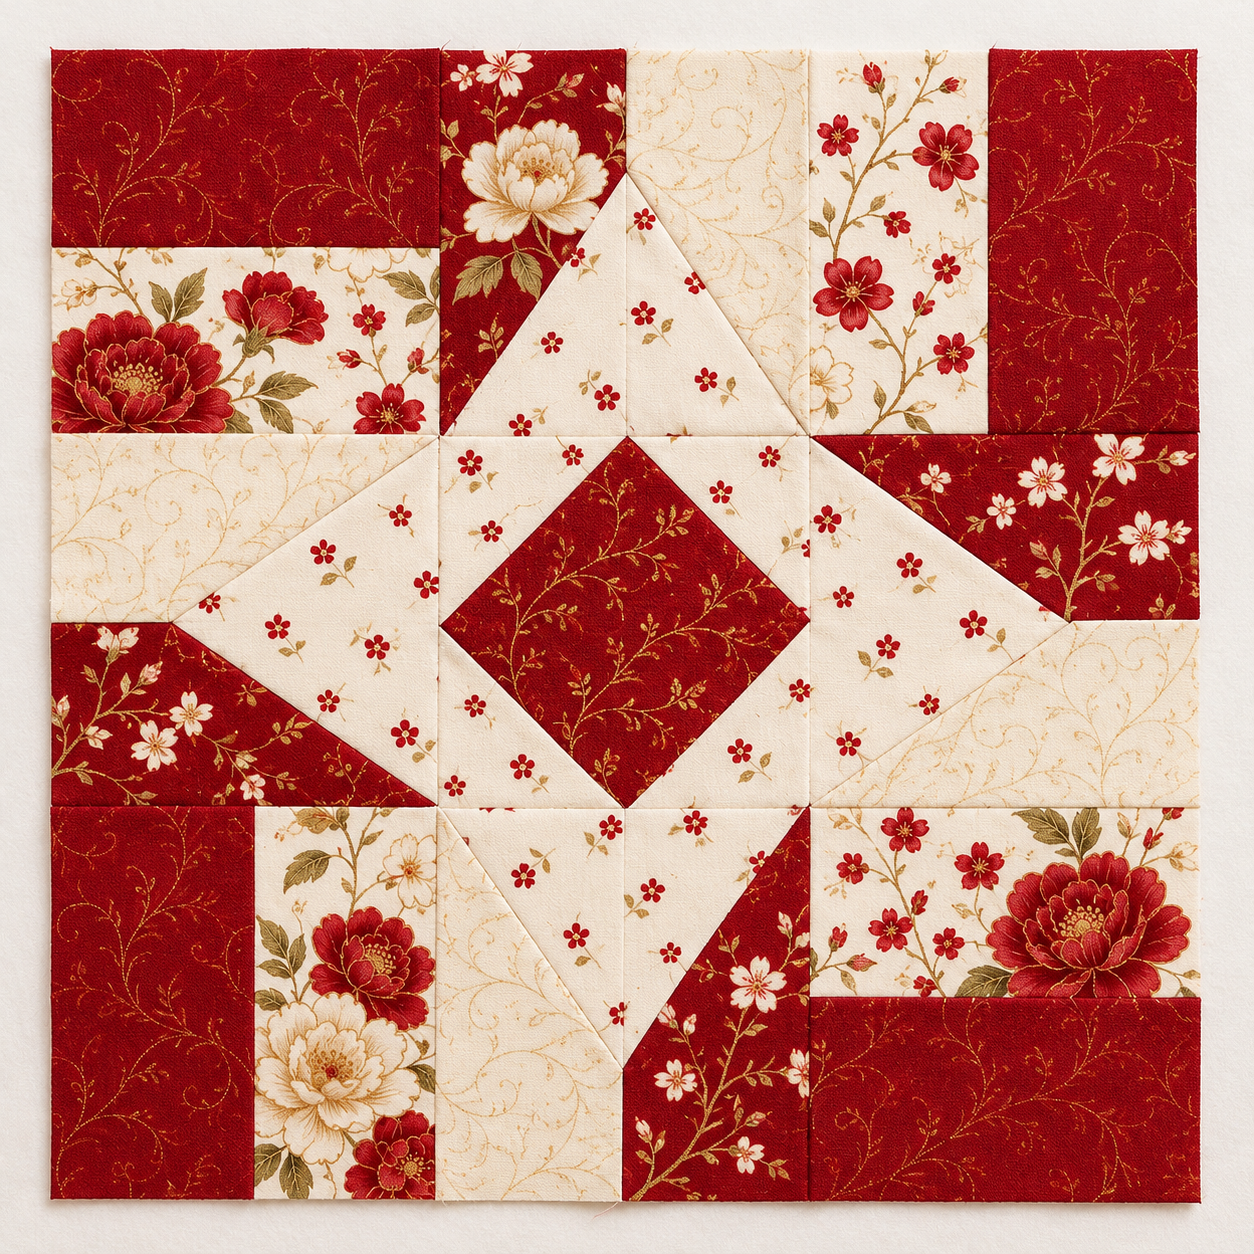
Twinkle is assembled from nine units arranged in three rows. A square-in-a-square unit creates the central diamond. Four pieced triangle units sit above, below, and beside it, while pairs of rectangles fill the corners.
The illustration in the PDF uses yellow, pink, orange, ochre, and white. The yellow diamond provides a clear focal point, and the repeated yellow triangles help carry that color around the block. Pink adds another rhythm, while the white triangles keep the angular shapes easy to see.
The corner rectangles also contribute to the design. Their direction changes around the block, so their placement matters just as much as their color. Laying everything out before joining the rows lets you see how the individual sections work together.
Choosing a Palette That Sparkles
Start with the center diamond. This is a good place for a color you want to feature, such as golden yellow, berry pink, or turquoise. Then choose a fabric for the surrounding small triangles that gives the diamond a visible edge.
For a look close to the illustrated pattern, combine warm colors with a crisp light fabric. A softer interpretation might use dusty rose, pale gold, muted coral, and ivory. Deep blue, silver-gray, and white could give the same geometry a cooler mood.
Print scale deserves attention here. Small dots, fine florals, and subtle textures can add interest while keeping the narrow triangles readable. If you choose a larger print, place a template over the fabric to preview the portion that will appear in the finished unit. This is particularly helpful for the smaller block sizes.
Before cutting, arrange fabric swatches beside the diagram. Look for places where adjacent fabrics are so similar in value that their shared edge disappears. A quick photograph in grayscale can help reveal those areas.
Choose Your Block Size First
The pattern includes four finished sizes. Each assembled block is half an inch larger in both directions to allow for the seams that will join it to the next part of your project.
| Finished size | Assembled size before joining |
|---|---|
| 9 × 9 inches | 9½ × 9½ inches |
| 12 × 12 inches | 12½ × 12½ inches |
| 18 × 18 inches | 18½ × 18½ inches |
| 24 × 24 inches | 24½ × 24½ inches |
Select one size before cutting and use its matching foundation templates. Highlighting the relevant column on your printed cutting chart helps keep the measurements easy to follow.
A smaller block can sit comfortably among other sampler blocks. A larger version gives individual fabric choices more presence and can become the focal point of a cushion or a quilted wall hanging.
Getting Comfortable with Foundation Paper Piecing
The triangle units use foundation paper piecing, often abbreviated as FPP. Fabric is positioned on the unprinted side of the template, and stitching follows the printed seam line. The paper provides a guide for the angled seams.
For one complete Twinkle Block, the pattern calls for four right templates and four left templates in the selected size. Print them at Actual Size or 100%, then measure the printed 1-inch test square before sewing. Check the square with a quilting ruler so that the finished paper-pieced units will fit the conventionally pieced sections.
Remember that the printed side of a foundation is the reverse of the finished fabric unit. Keep a left and right example together as a reference, and check fabric coverage before stitching. Folding a piece into its finished position can show whether it will cover the entire section with sufficient seam allowance.
The PDF recommends a short stitch length for sewing through the paper. Take your time pressing each piece outward, and follow the template’s outer trimming line. Consistent trimming helps the paired sections meet neatly.
Working Through the Remaining Units
The central diamond uses a square with smaller squares sewn diagonally across its corners. This construction shapes the diamond while keeping the outside of the unit square. Before trimming away excess fabric, fold each sewn corner outward and check that it reaches the edges beneath it.
The four corner units are made from pairs of rectangles. These offer a straightforward contrast to the angled piecing, but their dimensions still need the same attention. Measure the completed units before assembling the block.
Once all nine units are ready, arrange them beside the final diagram. Check the direction of the triangle units and the rotation of each rectangular corner. Photograph the layout before moving pieces to your sewing machine, then join the rows in order.
A Cutting-Chart Note for the 24-Inch Block
In the supplied PDF, the 24-inch cutting chart lists two Fabric C rectangles measuring 5½ × 10½ inches. The construction instructions call for four A1-C units, and the template directions call for four left foundations. These assembly requirements indicate that four Fabric C rectangles are needed for a complete 24-inch block. This note identifies a discrepancy in the supplied document and is based on its assembly instructions.
Ways to Use Your Finished Twinkle Block
Twinkle can bring an angular accent to a sampler quilt, especially alongside blocks with broader shapes or quieter fabric arrangements. Repeating it in a quilt lets you experiment with the center color while keeping the surrounding fabrics consistent.
For a smaller project, consider framing one block with a simple border. The added space can make its triangles easier to appreciate and provide room for quilting. A cushion featuring the 18-inch version or a wall hanging built around the 24-inch version would give the design plenty of room to show its details.
Download the Twinkle Block PDF
The printable pattern includes the cutting measurements for all four sizes, illustrated piecing instructions, and the left and right foundation templates. Keep the assembly diagram within reach as you work, and check the printer’s scale before preparing your foundations.
sample before cutting fabric for the entire quilt. This gives you a chance to check your fabric placement, practice the foundation-pieced sections, and see how the colors interact at the chosen size. Keep the sample nearby as a reference, especially when arranging the mirrored triangle units and rotating the corners.
Sashing can change the way repeated Twinkle Blocks look together. A light neutral fabric gives each block a little breathing room, while a darker choice can emphasize bright centers and pale triangles. Before committing to a layout, place strips of your proposed sashing fabric between two finished blocks. This simple preview helps you judge both the color and the spacing.
For the quilting, let the pieced shapes guide your choices. Straight lines can echo the central diamond, while gentle curves in the surrounding areas can soften the angular design. If you plan to quilt close to the triangle points, mark the lines lightly and avoid crowding bulky seam intersections. Test your thread on a leftover fabric sandwich to find a balance that adds texture while keeping the patchwork clearly visible.