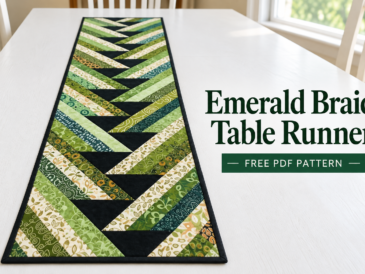
This New York Beauty table runner pattern combines pointed arcs, curved bands, and five contrasting fabrics in a Forest & Gold sampler. Ten blocks create a changing arrangement of quarter circles, with ivory points standing out against deep green and warm gold. The result is a patchwork design that gives you something different to notice in every row.
The runner offers room to explore several block variations within one project. Some arcs feature slender points, while others use broader shapes or small diamond units. You will find a free PDF pattern at the end of this article, including the placement diagram, fabric cuts, block recipes, and printable templates.
Keeping the pieces organized can make this New York Beauty table runner pattern easier to follow. Set aside a labeled tray or envelope for each block, with its fabric pieces and required paper foundations together. Keep the color key nearby, especially when working with alternating points, so you can check each fabric choice before sewing.
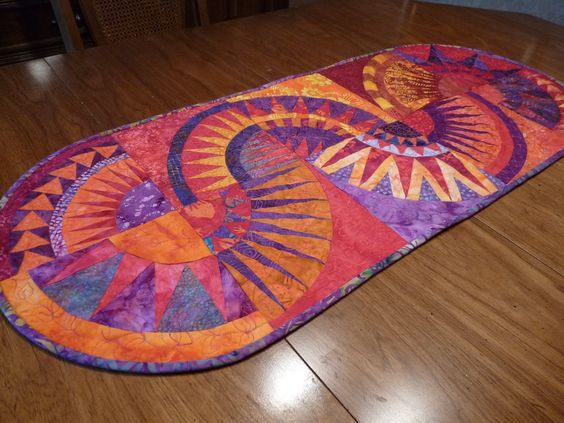
The blocks are arranged in two columns and five rows. Their changing orientations create movement along the runner, while plain curved bands give the detailed piecing space to stand out. A narrow ivory binding frames the outer edges without adding another pieced border.
Color contrast is central to the design. Deep forest green defines the dark shapes, light olive softens the transitions, and mottled green introduces a printed texture. Gold adds warmth, while ivory separates neighboring points. Keeping those differences between light and dark fabrics will help the curved pattern remain visible if you choose another palette.
Project Size and Skill Level
| Detail | Measurement or information |
|---|---|
| Layout | 10 blocks in 2 columns and 5 rows |
| Finished block | 8 × 8 inches |
| Unfinished block | 8½ × 8½ inches |
| Pieced design | 16 × 40 inches / 40.64 × 101.60 cm |
| Top before binding | 16½ × 40½ inches / 41.91 × 102.87 cm |
| Seam allowance | ¼ inch |
| Skill level | Experienced intermediate to advanced |
The bound runner is approximately the size of the unquilted top; quilting and washing may reduce its dimensions. The 16 × 40-inch measurement refers to the pieced design between the outer seam lines.
This project uses foundation paper piecing and curved seams. The downloadable pattern is a newly drafted adaptation of the reference photograph, with regularized angles and radii. It has not been physically test-sewn, so make one trial block before cutting fabric for the entire runner.
Materials You Will Need
The following quantities match the ten-block PDF pattern and assume at least 40 inches of usable fabric width.
| Fabric | Quantity for the top |
|---|---|
| Deep forest green | 1¼ yards |
| Light olive green | 1 yard |
| Mottled green print | ¾ yard |
| Golden yellow | 1 yard |
| Ivory | ¾ yard |
For finishing, allow 1½ yards of backing, cut to 25 × 49 inches, and a batting piece of the same size. Reserve an additional ⅓ yard of ivory for binding, cut into four 2½-inch strips across the usable fabric width.
You will also need foundation paper, a printer, a rotary cutter, a cutting mat, a quilting ruler, fine pins, thread, and an iron. The fabric allowances include oversized paper-piecing blanks; the PDF explains how many rectangles to cut in each color and size.
Abbreviations: FPP means foundation paper piecing, WOF means width of fabric, and RST means right sides together.
How the Runner Comes Together
1. Print and check the templates. Print the required pages at 100% or Actual Size, using the copy counts in the PDF. Measure both sides of the one-inch control square before cutting. The paper-piecing foundations are already mirrored for sewing on the printed side.
2. Prepare one block at a time. Follow its color recipe and label the fabric pieces before sewing. This is especially helpful where the point colors alternate around an arc. Cut the plain centers, bands, and outside corners with their corresponding templates; some curved pieces are cut on a fabric fold.
3. Piece the pointed arcs. Sew the numbered patches in order, checking that each new fabric piece covers its intended area and seam allowance when opened. Some arcs use two half panels, while the diamond and notch sections use individual cells. Follow the joining instructions for that template family.
4. Sew the curved layers. Build each block from the center outward. Match the seam-line endpoints and alignment marks before sewing each curve, and check for small tucks before pressing. Measure every completed block at 8½ inches square, preserving the allowances beyond the points.
5. Assemble and finish. Arrange the blocks exactly as shown in the placement map. Join the two blocks in each row, then join all five rows. Layer the top with batting and backing, quilt the sandwich, and finish the edges with the ivory binding.
Choosing Colors and Quilting Details
Before cutting a different colorway, place your fabrics together and compare their values. A dark blue could take the role of forest green, for example, while a pale blue replaces light olive. Keep a distinctly light fabric for the ivory areas so the narrow points remain easy to see. Small prints are useful where larger motifs would disappear into the piecing.
The plain centers and curved bands provide space for quilting. Echo lines can follow the patchwork shapes, while feathers or scrolls can add detail to the larger open areas. The decorative quilting visible in the reference photograph is separate from the piecing templates, so plan those stitches independently.
As you complete the blocks, place them in their planned positions on a design wall or a clear table. Seeing the five rows together helps you follow the changing direction of the curves. Take a quick photograph of the arrangement before moving the blocks to your sewing machine, giving yourself a convenient reference during assembly.
Pressing deserves attention throughout this project because several seams meet around the pointed arcs. Check each newly sewn section before adding the next layer, and press gently to avoid pulling the curved edges out of shape. Addressing a small tuck or bulky intersection while the block is still separate is easier than correcting it after the runner has been assembled.
Download the Free PDF Pattern
The Forest & Gold New York Beauty table runner pattern includes 32 pages, with a colored layout, cutting tables, ten individual block recipes, construction guidance, and 18 pages of actual-size templates. Keep the printing checklist handy, because some foundation pages require more than one copy.
Download the free PDF pattern below and begin with one trial block. Once you have checked the print scale and practiced the curved joins, use the placement map to build the runner one row at a time.
New York Beauty Table Runner Pattern
When deciding where to display the finished runner, consider how much of the patchwork will remain visible. A simple vase or a small arrangement placed on one of the quieter curved areas can complement the design while leaving the pointed blocks on view. The green, gold, and ivory palette also pairs naturally with wood furniture and plain table linens.
If you make the runner as a gift, a small label on the back can record the completion date and a personal message. You might also keep a photograph and a few fabric swatches in your project notebook. Those details preserve the story of this version and provide a useful starting point if you decide to make another runner in a different color combination.