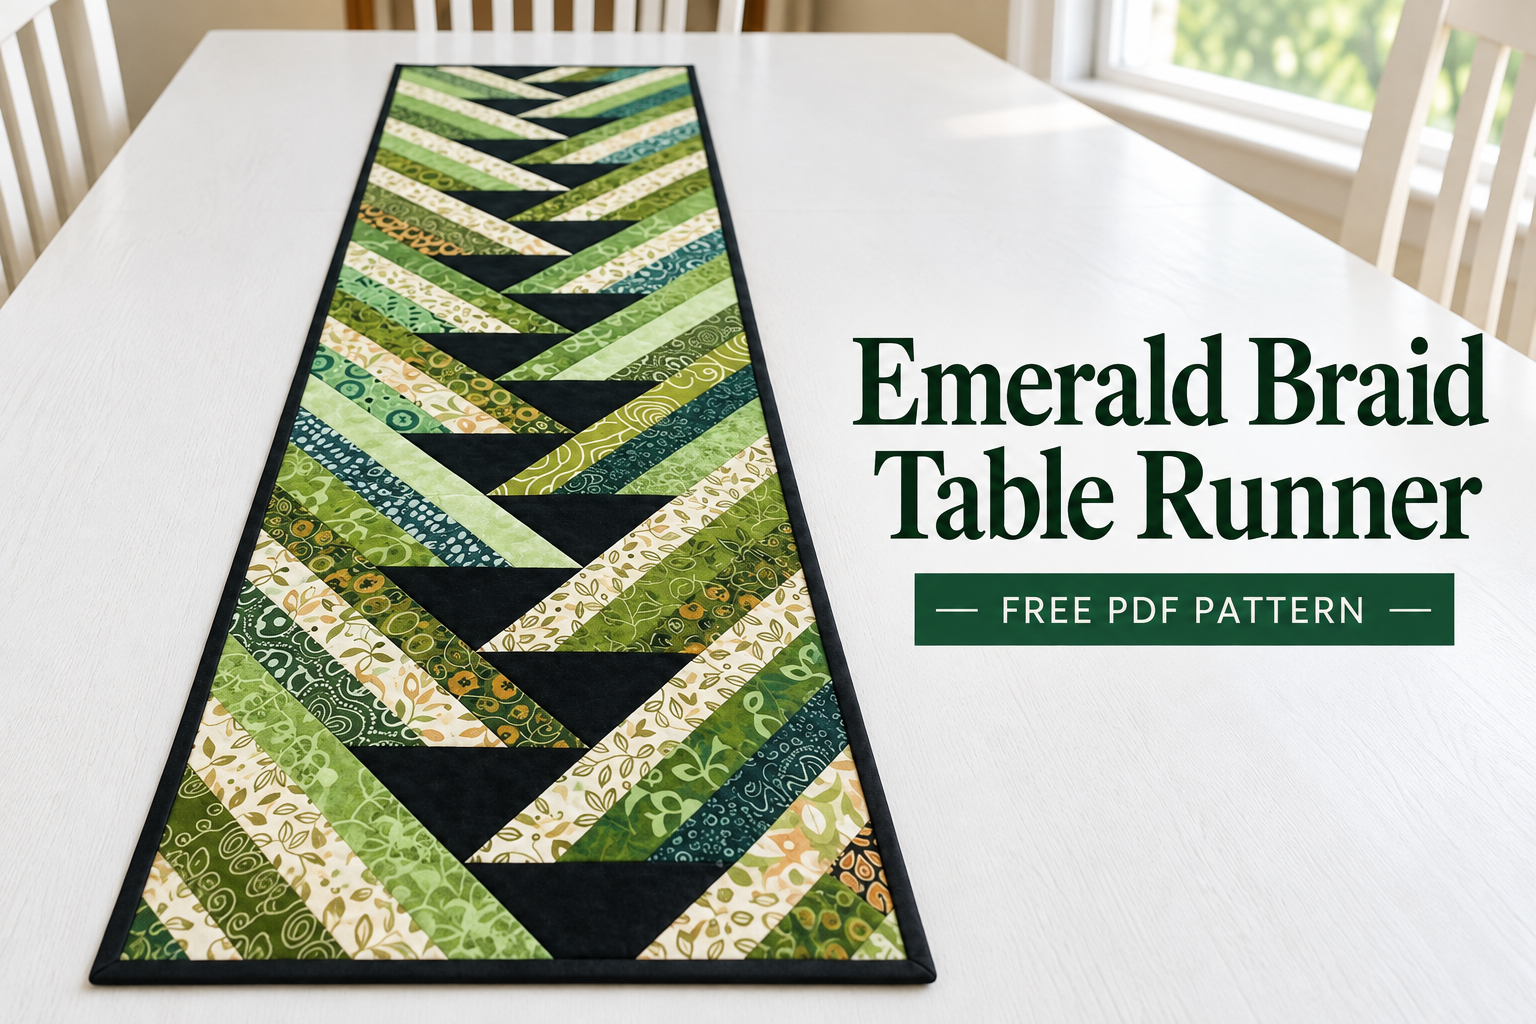
The Emerald Braid Table Runner Pattern combines green and ivory fabrics with bold black triangles to create a flowing braided design. Diagonal bands cross the runner, while the dark shapes alternate slightly to the left and right, giving the patchwork a sense of movement.
Soft sage, olive, forest green, and cream prints bring variety to the design. A narrow black binding repeats the central triangles and gives the edges a clean finish. Display the runner on a dining table, sideboard, or console where the full length of the braid can be seen.
You can download the free PDF at the end of this article. It includes cutting measurements, a fabric placement chart, assembly diagrams, and full-size foundation templates.
Thread color can subtly change the appearance of the finished runner. A shade close to the green fabrics will allow the patchwork to remain the main focus, while a contrasting thread will make the quilting more noticeable. Try a few lines of stitching on leftover fabric layered with batting before deciding. Include both a light print and a black scrap in your sample to see how the thread looks across the different areas.
Project Size and Skill Level
- Approximate finished size: 16½ × 51½ inches, or 41.9 × 130.8 cm.
- Pieced design inside the binding: 16 × 51 inches.
- Construction: 17 foundation-pieced rows.
- Row types: Nine A rows and eight B rows.
- Skill level: Confident intermediate.
- Seam allowance: ¼ inch unless otherwise indicated.
This version was reconstructed from a reference photograph. Its dimensions and piece counts were calculated for the downloadable pattern, and it has not been test-sewn. Begin with one A row and one B row to check the construction before cutting the full project.
Materials Needed
Choose quilting cottons with a mix of light, medium, and dark values. Small florals, leafy prints, and subtle textures suit the narrow diagonal bands.
| Material | Amount |
|---|---|
| Solid black fabric | 1 yard, including binding |
| Ivory floral fabric | ½ yard |
| Seven coordinating green and cream prints | ⅜ yard of each |
| Backing fabric | 1¾ yards |
| Batting | 21 × 56 inches |
| Foundation paper | 17 sheets, plus paper for practice |
The fabric calculations assume 40 inches of usable width of fabric. Allow extra for substantial shrinkage, directional prints, or additional practice pieces.
You will also need an inch ruler, rotary cutter, cutting mat, pins, thread, an iron, paper scissors, removable tape, and a printer. In the PDF, WOF means width of fabric, and FPP means foundation paper piecing.
Understanding the Braided Design
The runner uses two row types with the same dimensions. Each contains one black triangle surrounded by diagonal printed sections. The triangle sits slightly farther left in Row A and farther right in Row B.
All the black triangles point toward the same end of the runner. Alternating the two row types creates the central zigzag, while the fabric placement chart helps the colored bands connect across the horizontal seams.
Foundation paper piecing provides a printed guide for the angled seams. Each section is numbered, allowing you to build the row from the black center outward and trim it to size after sewing.
Assembly Overview
- Organize your fabrics. Assign the selected prints to the fabric codes in the PDF. Cut and label the patches, keeping the black center pieces separate from the binding strips.
- Prepare the foundations. Print nine copies of Foundation A and eight copies of Foundation B at 100% or Actual Size. Measure the test square, then join the two paper halves as instructed. The templates are already reversed for paper piecing; do not mirror them again.
- Piece each row. Begin with the black center patch and add the printed fabrics in numerical order. Before stitching, check that each patch will cover its section and seam allowances when folded open.
- Check an A/B pair. Trim the completed rows to 16½ × 3½ inches. Join one A row to one B row, matching the diagonal seams. The pair should measure 16½ × 6½ inches before adding more rows.
- Assemble the runner. Continue alternating A and B rows, starting and ending with A. Keep every black triangle pointing in the same direction and follow the color chart throughout.
- Quilt and bind. Remove the foundation papers, press the top, and layer it with batting and backing. Quilt as desired, then finish the perimeter with the narrow black binding.
Choosing Colors for Your Table
The green palette works well with the botanical character of the reference fabrics. For a softer appearance, emphasize sage and cream. For stronger contrast, include more olive and forest tones while keeping enough light fabric to define the braid.
You can also reinterpret the design in another palette. Burgundy and cream could create a warm seasonal version, while navy and pale blue could give it a cooler appearance. Keep a clear contrast between the triangular centers and the surrounding fabrics so the repeated shapes remain visible.
Download the Free Emerald Braid Table Runner Pattern
The Emerald Braid Table Runner Pattern offers a focused project for practicing angled seams, fabric placement, and foundation paper piecing. Working through one row at a time makes it easier to check the alignment as the braid develops.
The free 13-page PDF includes the materials list, cutting schedule, color map, illustrated assembly instructions, and two full-size foundation masters.
Emerald Braid Table Runner Pattern
As you assemble the Emerald Braid Table Runner, check the growing piece on a flat surface after joining several rows. Look for smooth edges, aligned stripe seams, and black triangles pointing in the same direction. Finding a misplaced section early makes it easier to correct. Press each completed seam gently, lifting and lowering the iron rather than pulling it along the angled patchwork.
When displaying the runner, give the braided design enough space to be seen. Plain dishes and simple linens can complement the patterned fabrics without making the table feel crowded. A small centerpiece placed slightly away from the middle can leave more of the black triangle sequence visible. The same runner can also bring color to a sideboard or console, where its full length becomes part of the room’s decoration.