A jigsaw puzzle quilt brings the fun of fitting pieces together into a colorful patchwork design. Bright tabs reach into neighboring shapes, white spaces create contrast, and a simple border gives the whole arrangement room to stand out. It is a playful choice for a bedroom, a family quilt, or a handmade gift for someone who enjoys puzzles.
This Jigsaw Puzzle Quilt Pattern uses square fabric cuts and straight seams to create the interlocking effect. The small angled corners give the pieces their distinctive shape, while a clear color map makes it easier to keep track of the connections. You can follow the cheerful palette shown here or plan a different combination with the same block layout.
At the end of this article, you will find the free English PDF guide with the cutting quantities, individual block recipes, assembly diagrams, and finishing instructions for this double-bed version.
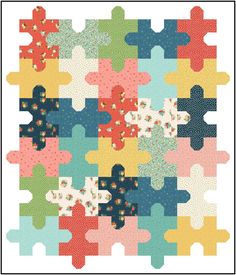
The accompanying pattern is an independently drafted adaptation of the supplied illustration. It keeps the arrangement of 30 puzzle pieces in five columns and six rows, including the white pieces and the tabs extending beyond the central rectangle.
Each square block contains part of its own puzzle piece and parts of the pieces beside it. That may sound unusual at first, but it is what makes the design practical to sew. A turquoise tab, for example, can be sewn inside a neighboring red block while still appearing to belong to the turquoise piece in the completed quilt.
Two alternating block arrangements organize those connections. The vertical version has sockets on the left and right, with tabs that continue above and below. The horizontal version has sockets above and below, with tabs extending left and right. Together, they create the familiar jigsaw silhouette.
Finished Quilt Size
The nominal finished design measures 80 x 92 inches, or approximately 203 x 234 cm. A white border surrounds the colorful puzzle field, providing a clean frame and a useful amount of overhang for a double bed.
| Pattern detail | Measurement or quantity |
|---|---|
| Nominal finished design | 80 x 92 inches |
| Approximate metric size | 203 x 234 cm |
| Finished block | 12 x 12 inches |
| Block before joining | 12 1/2 x 12 1/2 inches |
| Block arrangement | 5 across x 6 down |
| Total blocks | 30 |
| Outer white border | 6 inches finished on every side |
On a 54 x 75 inch full mattress, the drafted width gives approximately 13 inches of drop on each side. On a 138 x 188 cm mattress, the side drop is approximately 32.6 cm. Measure your mattress and consider its height before starting, because quilting and washing can reduce the final dimensions.
The completed quilt top measures 80 1/2 x 92 1/2 inches before quilting, including the outside seam allowance. The PDF identifies working measurements throughout so you can check the size after each major assembly stage.
Choosing Colors for Clear Puzzle Pieces
The illustrated version combines red, turquoise, blue, lime, golden yellow, pale yellow, and white. These distinct colors make the tabs and sockets easy to recognize. Solids and quiet tonal fabrics work especially well because their surfaces allow the outline of each piece to remain visible.
Pay particular attention to pale yellow and white. They are separate fabrics in this layout. The center of block C4 is pale yellow, while C2, A4, E4, and C6 are white puzzle pieces. Keeping a labeled swatch of each fabric beside your cutting chart will help prevent substitutions that change the intended appearance.
If you choose a different palette, keep neighboring pieces easy to distinguish. A dark blue beside a medium turquoise can work well, while two very similar light fabrics may make their shared connection harder to see. Photographing your fabric choices together is a useful way to judge the overall balance before cutting.
What You Will Need
Prepare quilting cottons in your chosen colors, backing, batting, and binding fabric. You will also need a rotary cutter, cutting mat, rulers, fine marking pencil, pins, an iron, and a sewing machine. A ruler that makes it easy to check a 12 1/2 inch block is helpful as the project grows.
The PDF includes fabric allowances and exact cutting counts for the illustrated layout. Its yardage calculations assume at least 40 inches of usable fabric width after selvages are removed. White is used in several roles, including the white puzzle pieces, background units, and outer border, so reserve its cuts according to the full chart.
Making the Small Angled Corners
The basic construction unit starts as a 4 1/2 inch square. For a shaped tab or socket unit, two 1 3/4 inch squares are added at selected corners using stitch-and-flip piecing. After the diagonal seams are sewn and the excess is trimmed, the unit still measures 4 1/2 inches square.
The corner position controls the direction of the tab. Flipping both upper corners produces a tab pointing upward; flipping both lower corners produces one pointing downward. The same idea applies to the left and right directions. The PDF shows all four arrangements with labeled diagrams.
For a socket inside a block, the large base square comes from the neighboring piece’s color, while the two small corners match the receiving block’s body color. Those small triangles shape the socket around the incoming tab. Check both fabrics before chain piecing, since changing either one changes the visible connection.
Assembling the Puzzle Blocks
Each block uses seven plain body-color squares and two shaped socket units, arranged as a nine-patch. Sew three units into each small row, then join the three rows using a consistent quarter-inch seam allowance.
For the vertical block, the socket units sit at the left and right of the middle row. For the horizontal block, they sit at the top and bottom of the middle column. Keep the block label attached after pressing so it returns to the correct position in the quilt.
The guide provides a separate recipe for every block, including the source color for each socket base. Working from those recipes is easier than trying to remember the entire quilt at once. Small labeled bags or trays can keep the pieces for each block together.
Completing the Outside Tabs
The pieces around the perimeter have tabs that extend beyond the rectangular block grid. A narrow pieced band completes these shapes and gives the puzzle its floating appearance against the white background.
The side bands are added first. Each contains 18 units, including the tabs that point outward from the left and right edges. The top and bottom bands follow, with 17 units each, including their white corner fillers.
Orientation matters here: the top tabs point up, the bottom tabs point down, and the side tabs point away from the center. The PDF includes numbered band maps, so you can check the sequence before sewing the long strips to the quilt.
Adding the White Border and Quilting
Once the central blocks and tab bands are joined, the puzzle field measures 68 1/2 x 80 1/2 inches, including its seam allowance. The outer white border is then added in two stages: sides first, followed by top and bottom.
Measure through the center before attaching each border pair. Pin the ends, center, and quarter points, then sew with the fabric supported so the long edges stay flat. Press gently and check the completed top before preparing the backing and batting.
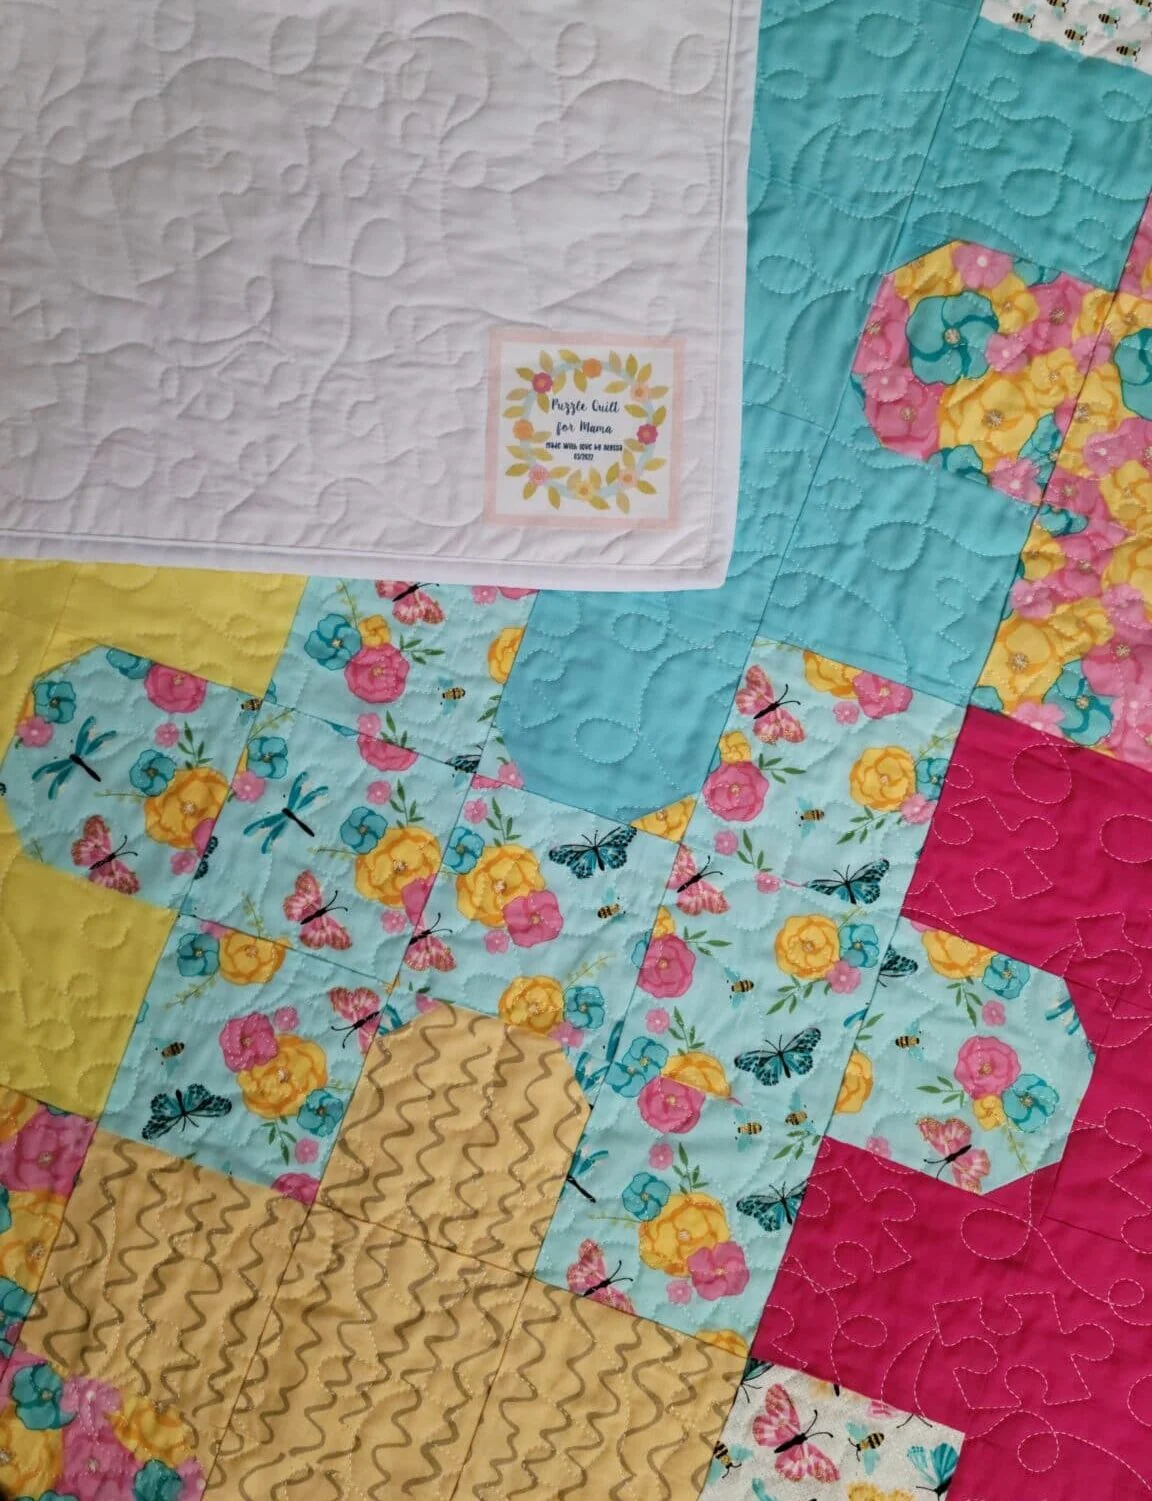
A soft allover meander can suit the playful design. Echoing the puzzle silhouettes is another option, especially around the white pieces, where quilting can make their outlines more visible. Follow the spacing requirements of your chosen batting, and test any marking tool on a fabric scrap first.
Blue binding repeats one of the main colors and defines the edge of the white frame. The PDF includes binding-length calculations and both regular-width and wide-backing options.
Make a Test Pair Before Cutting Everything
This adaptation has been checked digitally for measurements, color quantities, and connections, but it has not been sample sewn. Make blocks A1 and B1 first, then join them to check both the seam allowance and the shared puzzle connection.
Each block should measure 12 1/2 inches square before joining. The sewn pair should measure 24 1/2 x 12 1/2 inches. Confirming these measurements early gives you a reliable starting point for the remaining blocks.
Download the Free Jigsaw Puzzle Quilt Pattern PDF
The free English PDF contains 20 pages with:
- Fabric estimates and exact cutting counts for the illustrated palette.
- Diagrams for all four tab directions and both block arrangements.
- Individual color recipes for all 30 blocks.
- A labeled quilt layout and numbered maps for the outside tab bands.
- Border, backing, batting, and binding instructions.
- An actual-size unit check, troubleshooting notes, and a printable project tracker.
Print the actual-size reference page at 100% / Actual Size and measure its 1 inch test square. Keep the block recipes and band maps beside your machine as you sew.
Jigsaw Puzzle Quilt Pattern PDF
A jigsaw puzzle quilt rewards careful placement with a bright, connected design. Its individual units are manageable, and the repeating construction becomes easier to follow once the first pair of blocks is complete.
Choose colors that stand out beside one another, keep every block labeled, and check the outside tabs before adding the border. Those small habits help the pieces come together into a cheerful quilt with a clear pattern and plenty of handmade character.