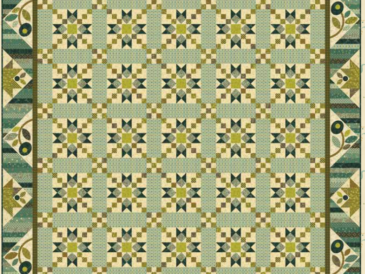
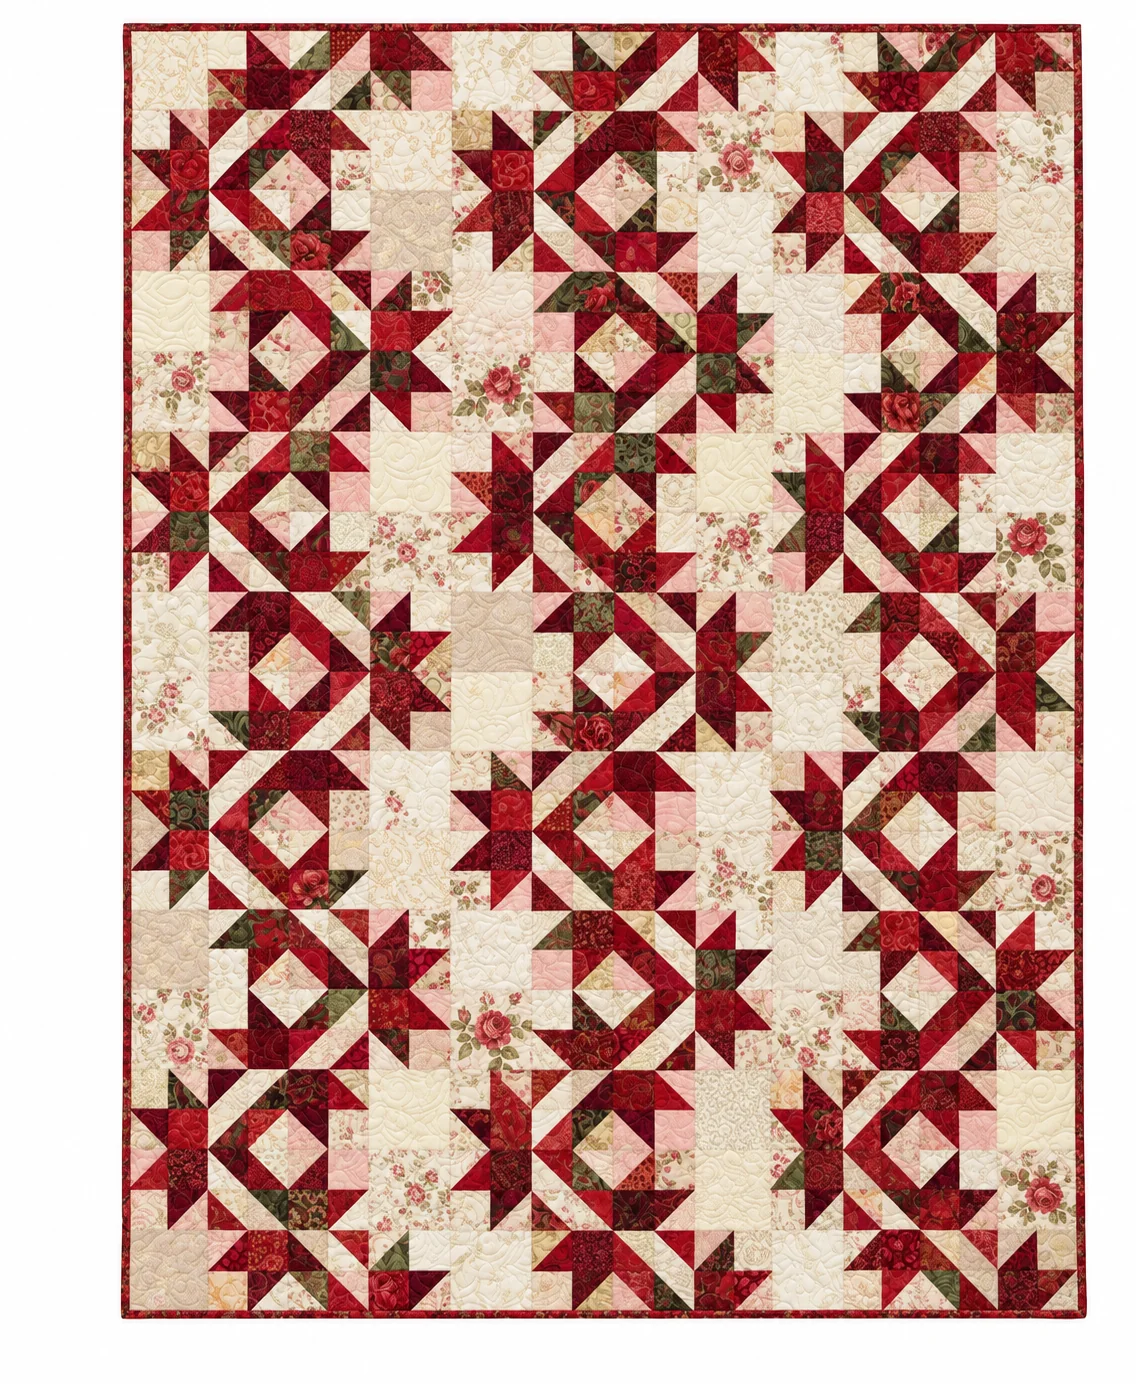
The Falling Stars Quilt brings together colorful triangles, soft backgrounds, and a repeating arrangement that gives the quilt a sense of movement. Stars and diamond shapes appear where neighboring blocks meet, creating a design that invites you to look a little closer. It is a lovely way to combine favorite fabrics in a quilt with plenty of personality.
Much of its charm comes from the balance between busy patchwork and quiet background areas. Cream, ivory, and pale prints give the brighter fabrics room to stand out. Whether you choose rich jewel tones or a mix of leftover prints, those light spaces help keep the overall design clear.
At the end of this article, you can download a free PDF guide with cutting measurements, block diagrams, and assembly instructions for a quilt measuring approximately 48 × 64 inches.
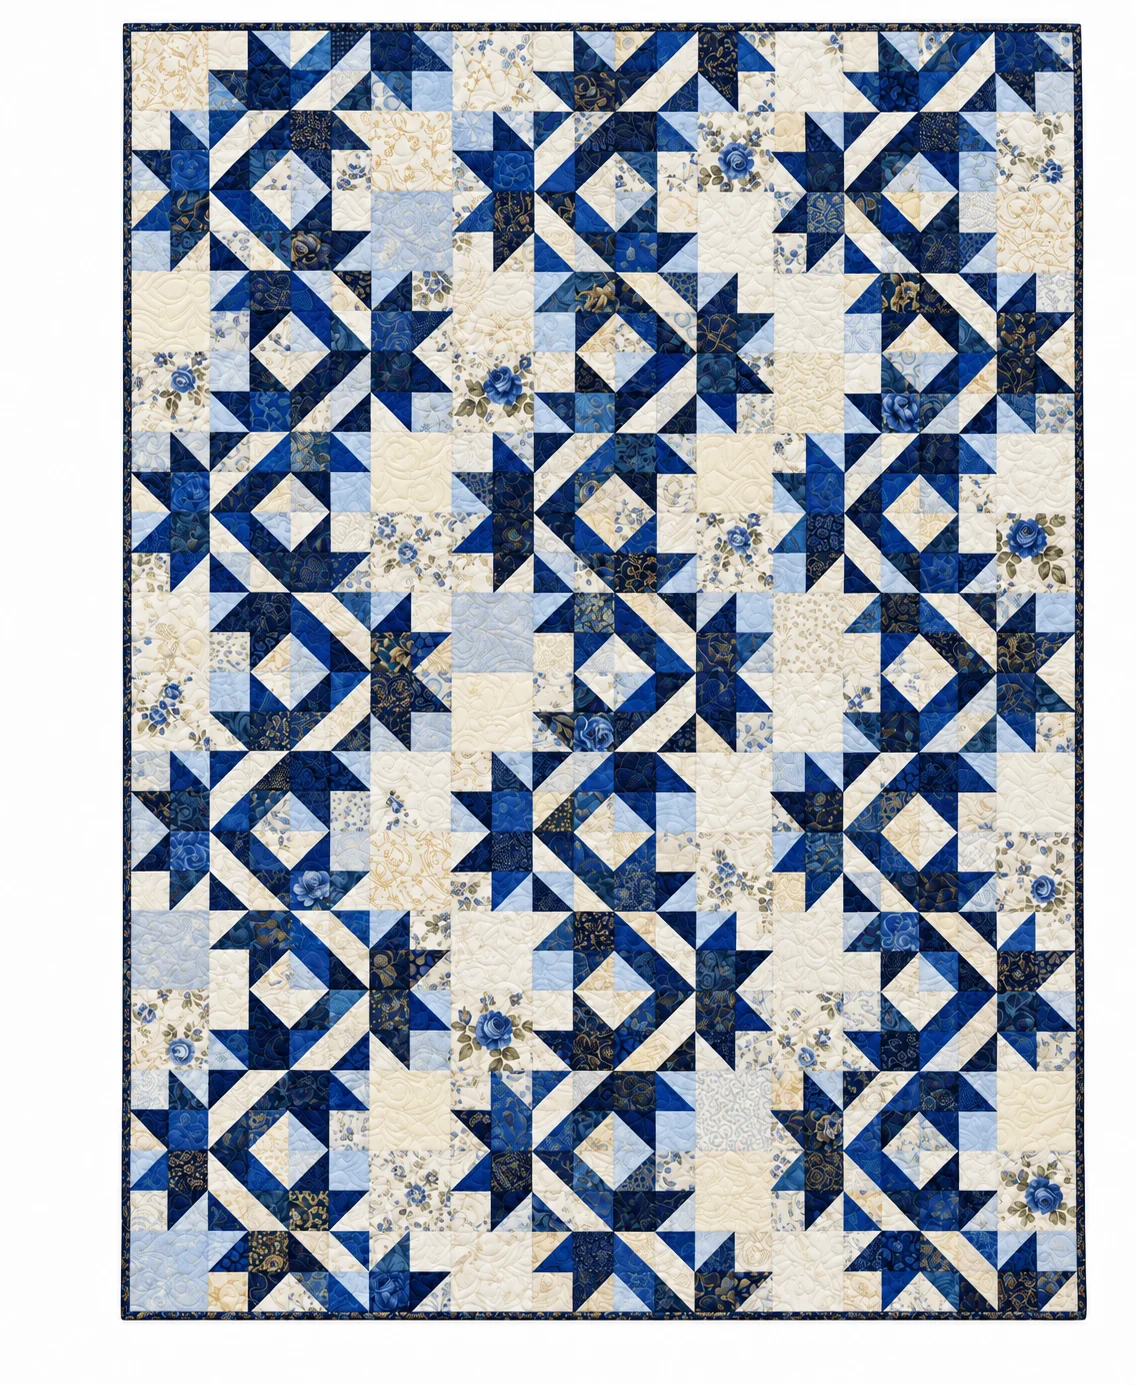
The Falling Stars Quilt can take on a different personality with a smaller color palette. Burgundy, dusty rose, and cream create a gentle floral look, while navy, teal, and ivory give the patchwork a cooler feel. Keep the background noticeably lighter than the star fabrics so the arrangement remains easy to see.
Small pieces of fabric from earlier projects can make this quilt especially meaningful. A floral print from a favorite quilt or a leftover strip from a handmade gift can become part of the stars. Distributing these familiar fabrics throughout the top adds little details you can enjoy discovering in the finished quilt.
How the Falling Stars Design Comes Together
Although the finished arrangement looks intricate, this version uses one repeating block. Each block finishes at 8 inches square and combines a large background square, smaller squares, and half-square triangles.
The quilt contains 48 blocks arranged in eight rows of six. Rotating the blocks into the positions shown in the assembly diagram creates the larger pattern. This makes the layout stage especially rewarding: individual units begin to connect, revealing stars and pale diamonds across the quilt.
There is no sashing or added border in this version. The blocks join directly together, allowing the shapes to continue across the surface.
Choosing Fabrics with Enough Contrast
For a look similar to the reference quilt, gather a variety of medium and dark fabrics in red, teal, blue, purple, green, and gold. Small florals, batiks, and subtle geometric prints can add texture without hiding the piecing.
Use lighter fabrics for the background, keeping a noticeable difference between the two groups. A pale print can look light on its own but blend into a colored triangle once they are sewn together. Try placing your fabrics side by side before cutting, or take a black-and-white photograph to check their relative values.
Repeating a few colors throughout the quilt can help a varied scrap collection feel connected. You can spread a favorite burgundy or teal fabric across several rows while allowing the remaining prints to change from block to block.
Preparing and Piecing the Blocks
The main pieced unit is the half-square triangle, often called an HST. In the accompanying guide, these units are made slightly oversized and trimmed to 2½ inches square before assembly. Careful trimming helps the diagonal seams meet cleanly and keeps the blocks consistent.
Use a ¼-inch seam allowance throughout the piecing process. Make one complete test block first and check that it measures 8½ inches square before assembly. This gives you a chance to adjust your cutting, pressing, or seam allowance before preparing the entire quilt.
Press gently instead of sliding the iron across the fabric. Triangle edges can stretch, and keeping the units square makes the later assembly much easier.
Arranging the Quilt Top
Once the blocks are ready, lay them out on a design wall, a clean floor, or another large surface. Follow the rotation diagram carefully, paying particular attention to the location of each block’s large light square.
Before sewing, take a photograph of the complete layout. Looking at the quilt on a smaller screen can help you spot an incorrectly turned block or an area where too many similar colors have gathered.
Label the rows from top to bottom, then join the blocks into rows. Match the seams as you connect the rows, checking that the stars and diagonal shapes remain aligned.
Quilting and Finishing
A flowing quilting design can complement the angular patchwork. Gentle curves, loops, or a relaxed meander add texture while allowing the fabric arrangement to remain the focus. Choose quilting spacing that suits the batting you are using.
For the binding, consider a darker fabric that repeats one of the quilt’s main colors. Burgundy, deep teal, or navy can create a defined edge. A scrappy binding is another option if you would like to carry the mix of fabrics all the way around the quilt.
Download the Free Falling Stars Quilt PDF
Ready to begin? The free Falling Stars Quilt PDF includes a materials list, cutting quantities, half-square triangle instructions, a block construction diagram, and the complete rotation layout.
This guide was reconstructed from the supplied quilt photograph and assembly image. The cutting measurements were calculated for the illustrated arrangement, but the pattern has not been physically sew-tested, so begin with one test block.
Download the free Falling Stars Quilt PDF below and start planning your fabric combination.
With its colorful patchwork and repeating stars, this quilt offers a satisfying way to turn a collection of fabrics into something useful and personal. Take your time with the triangle units, enjoy arranging the colors, and let each carefully placed block bring the design together.
For manageable sewing sessions, divide the work into stages. Cut and organize the squares first, prepare the half-square triangles next, and then assemble a few blocks at a time. Keeping the pieces in labeled trays or bags makes it easier to pause and return without losing track of the quantities.
Thread color also changes how the finished surface looks. A soft cream or light neutral can blend into the background, while a contrasting thread makes the quilting more visible. Try a sample on leftover fabric with the same batting and backing before choosing the thread for the whole quilt.
Before giving your Falling Stars Quilt as a gift, consider adding a fabric label to the back. Include the date, the recipient’s name, and a short personal message. This small finishing touch records the story behind the quilt and gives the recipient something special to discover each time they unfold it.