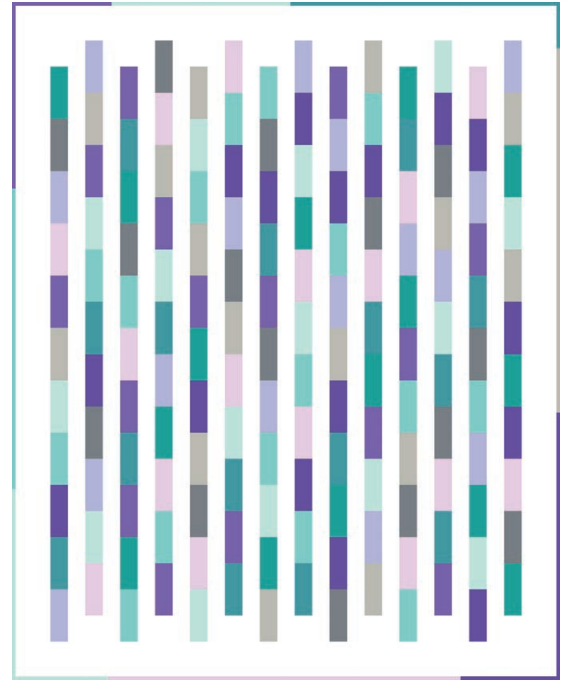
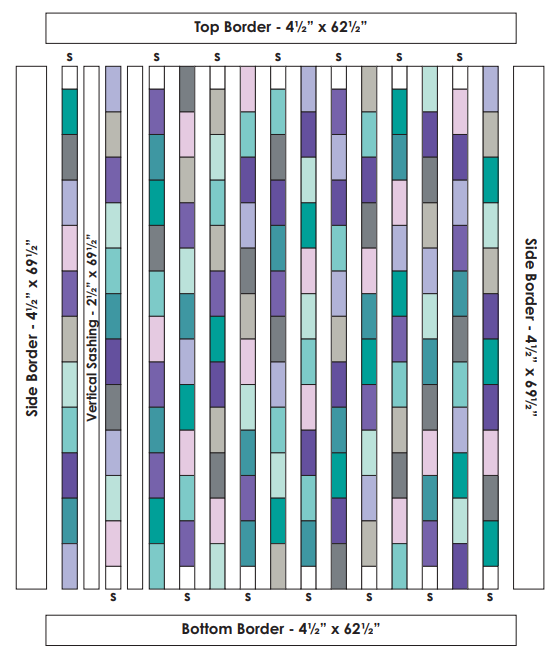
Once you have cut your strips, arrange them in the desired order for your quilt top. You can create a gradient effect by arranging your strips from light to dark or vice versa. Experiment with different arrangements until you find one that you love.
Next, sew the strips together using a quarter-inch seam allowance. Press the seams open with an iron to ensure that your quilt top lays flat.
To frame your quilt top and give it a polished look, you can add borders. Cut strips of fabric to the desired width for your borders and sew them to the sides of your quilt top. Press the seams open.
Now it’s time to layer your quilt. Lay your backing fabric wrong side up, followed by the batting, and finally, your quilt top right side up. Smooth out any wrinkles and baste the layers together using quilting pins.
Quilt as desired. You can quilt along the seams of your vertical strips or get creative with different quilting designs. Be sure to secure the layers together well.
To finish your quilt, trim any excess batting and backing fabric, leaving a uniform edge around the quilt top. Then, attach your binding using your preferred method. You can either hand stitch the binding to the back of the quilt for a traditional finish or use your sewing machine for a quicker result.
Once your binding is attached, give your quilt a final press with the iron to smooth out any wrinkles. Your Verticals quilt is now complete and ready to be enjoyed or gifted to someone special.
FREE PATTERN
Discover the beauty and versatility of the Verticals quilt pattern! Whether you’re a seasoned quilter or just starting out, this pattern offers endless possibilities for creativity. Download the PDF below to get started on your own Verticals quilt journey. Happy quilting! 🧵✨
FREE PATTERN
The Verticals quilt pattern offers endless possibilities for customization, making it a favorite among quilters of all skill levels. Whether you’re a beginner or an experienced quilter, this pattern is sure to inspire your creativity and produce stunning results. So gather your fabrics, fire up your sewing machine, and start quilting!