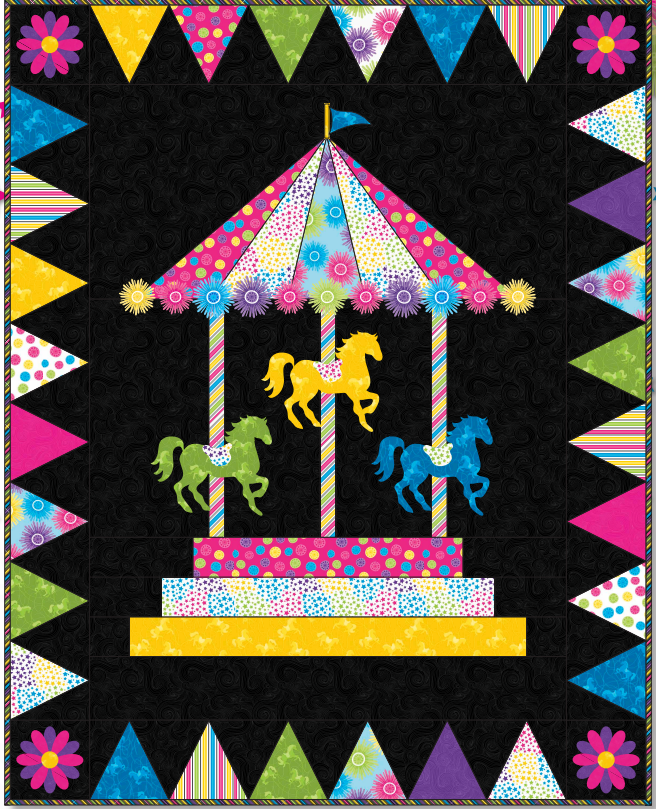
Welcome to the enchanting world of quilting, where creativity knows no bounds! In this tutorial, we’ll explore the magical realm of the Painted Carousel quilt pattern, a delightful design perfect for creating a charming baby quilt. Whether you’re a seasoned quilter or just starting your quilting journey, this pattern is sure to inspire and captivate.
Materials Needed:
- Fabric: Select a variety of colorful fabrics for the carousel horses, background, and border. Opt for high-quality cotton fabrics for a soft and cozy feel.
- Batting: Choose a lightweight batting suitable for a baby quilt.
- Thread: Coordinating threads for piecing and quilting.
- Rotary cutter, mat, and ruler: Essential tools for precise cutting.
- Sewing machine: A reliable machine to bring your quilt to life.
- Iron and ironing board: For pressing seams and achieving crisp edges.
Additional Materials and Supplies:
- Batting: 46″ x 56″
- 1 ¼ yds. lightweight paper-backed fusible web
- Threads for construction and quiltingCoordinating threads for appliqué
Getting Started:
Pattern Selection: Purchase or download the Painted Carousel quilt pattern. Ensure you understand the instructions and have all the necessary templates.
Fabric Preparation: Wash and press your fabrics before cutting to prevent shrinkage and ensure accurate measurements. Sort fabrics according to color and print to make the selection process smoother.
Cutting: Use the templates provided in the pattern to cut the carousel horse shapes and background pieces. Precision in cutting is key to achieving a polished and professional look.
Piecing the Carousel Horses:
Organize: Lay out the cut pieces to visualize the placement of each carousel horse. Experiment with color combinations to create a visually appealing arrangement.
Sewing: Begin by piecing together the carousel horses, following the pattern instructions. Take your time to match seams and maintain accuracy.
Assembly: Once the carousel horses are complete, assemble them into rows and then join the rows to form the main quilt top. Press seams carefully to ensure a flat and smooth finish.
Adding Background and Borders:
Background Placement: Attach the background pieces around the carousel horses to create a cohesive design. Press seams as you go to maintain a neat appearance.
Borders: Add borders to frame your masterpiece. Borders not only enhance the quilt’s aesthetic but also provide a finishing touch. Remember to measure and cut accurately for a balanced look.
Quilting and Finishing Touches:
Basting: Layer your quilt top, batting, and backing. Baste the layers together using your preferred method, whether it’s pins, spray baste, or another technique.
Quilting: Choose a quilting design that complements the carousel theme. Whether you opt for simple straight lines or more intricate patterns, quilting adds texture and secures the layers.
Binding: Finish your baby quilt by attaching the binding. Double-fold binding is a popular choice for durability and a polished edge.

We hope you enjoyed diving into the enchanting world of the Painted Carousel quilt pattern. To assist you on your creative journey, we’re thrilled to offer the complete pattern in a convenient PDF format. This comprehensive guide includes detailed instructions, templates, and tips to ensure your quilting experience is seamless and enjoyable.
Download the Painted Carousel quilt pattern for free and bring your vision to life. Click the link below to access the PDF and embark on this whimsical quilting adventure:
Congratulations! You’ve created a whimsical masterpiece with the Painted Carousel quilt pattern. This delightful baby quilt is not only a cozy and functional accessory but also a work of art that will be cherished for years to come. Happy quilting!