This Candle Quilt Block is a charming and festive design that brings warmth and seasonal beauty to any quilting project. With its three decorative candles, soft background, and ribbon-like bows at the base, this block is perfect for Christmas quilts, holiday wall hangings, table toppers, and cozy handmade gifts. It is a wonderful way to combine simple piecing with a cheerful holiday theme.
One of the things that makes this block so appealing is its versatility. You can create it in traditional Christmas colors like red, green, and gold, or give it a softer look with vintage-inspired fabrics and subtle seasonal prints. Whether you are sewing from scraps or choosing a coordinated fabric collection, this block offers plenty of room for creativity while still keeping a clean, classic structure.
In this tutorial, I will show you how to make a 12″ finished Candle Quilt Block step by step. The measurements are simple, the layout is beginner-friendly, and the finished result is both elegant and fun. If you are looking for a block that adds a festive touch to your quilting blog or your holiday sewing projects, this is a lovely one to make.
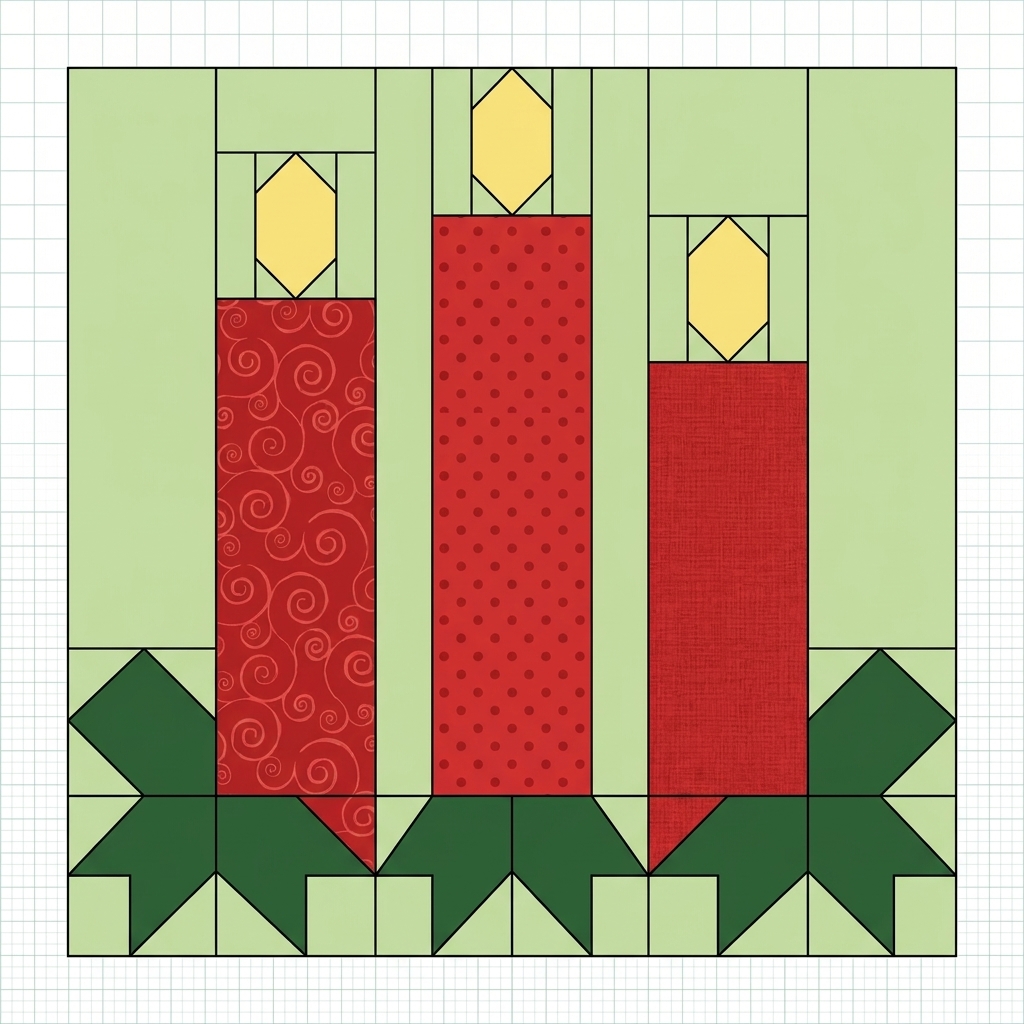
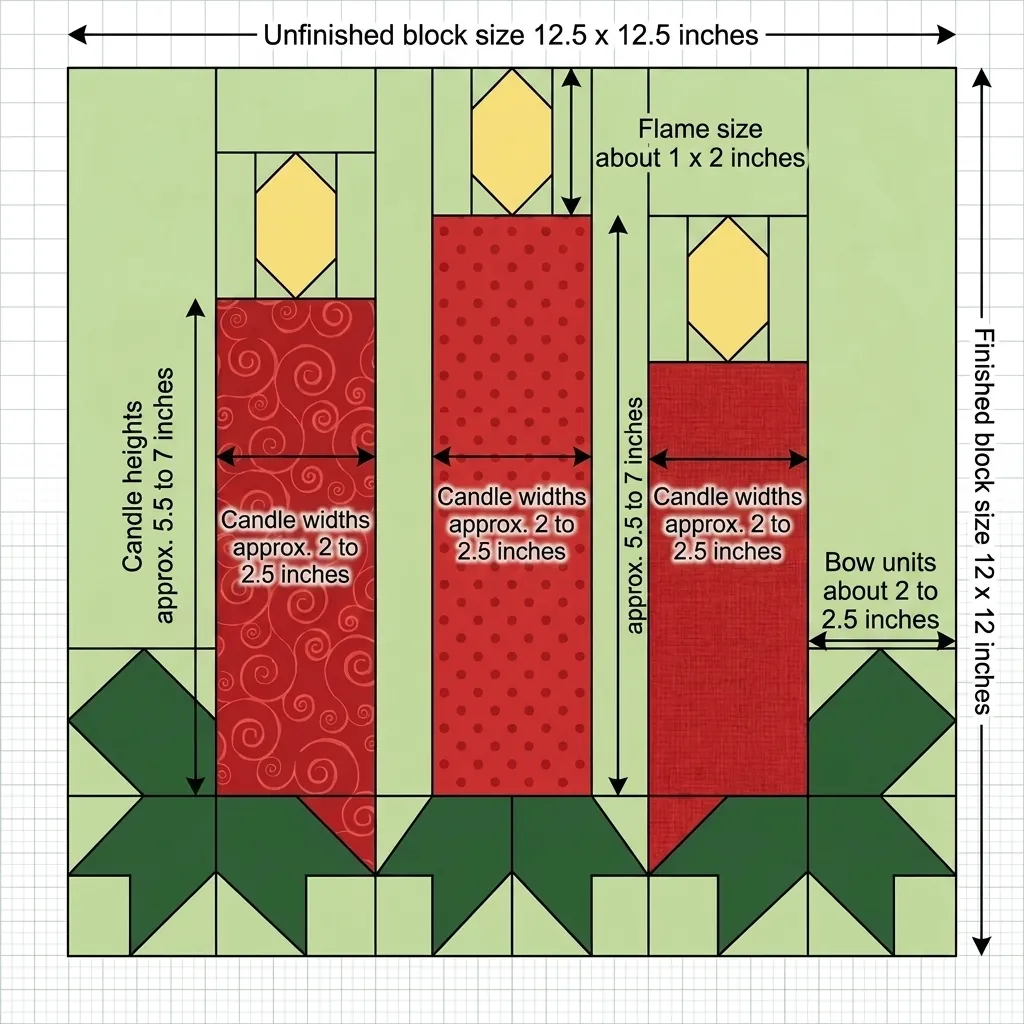
Finished block size: 12″ x 12″
Unfinished block size: 12 1/2″ x 12 1/2″
This candle quilt block is a lovely choice for Christmas quilts, winter wall hangings, table toppers, and holiday samplers. The design features three candles with flames and bows, set on a soft background, and it works beautifully as a single block or repeated in a full quilt.
Materials
You will need:
- Background fabric – light green
- Candle fabrics – 3 red prints
- Flame fabric – yellow or cream-yellow
- Bow fabric – dark green print
- Basic sewing supplies – rotary cutter, ruler, mat, pins or clips, iron, sewing machine
Fabric Cutting
Background fabric
Cut:
- 2 pieces 3″ x 12 1/2″ for the side panels
- 2 pieces 1 1/2″ x 12 1/2″ for inner background fillers if needed during layout
- 3 small rectangles 1 1/2″ x 2″ for the space behind each flame
- 6 small squares 1 1/2″ x 1 1/2″ for the bow corners
- Additional background pieces as needed to square up the block to 12 1/2″ x 12 1/2″
Candle fabrics
Cut:
- 1 piece 2 1/2″ x 6 1/2″
- 1 piece 2 1/2″ x 7″
- 1 piece 2 1/2″ x 5 1/2″
Flame fabric
Cut:
- 3 flame shapes approximately 1″ x 2″ finished
- The easiest method is to cut:
- 3 rectangles 1 1/2″ x 2 1/2″
Trim into flame points during assembly if preferred.
Bow fabric
Cut:
- 6 squares 1 1/2″ x 1 1/2″
- 3 small center triangles or connectors if you want a more detailed bow look
Suggested Layout
Arrange the block in three sections:
| Section | Description |
|---|---|
| Top | Flames with background around them |
| Center | Three candle bodies |
| Bottom | Green bow units under each candle |
The candles can be slightly different heights for a more playful and natural look.
Step 1: Make the Candle Tops
Sew each yellow flame onto its background section.
You can do this in two ways:
- Pieced flame: create a simple pointed unit with small side background pieces
- Applique flame: applique the flame shape onto a background rectangle
Press carefully so the flame stays crisp and centered above each candle.
Step 2: Make the Candle Bodies
Take your three red candle rectangles and pair each one with a flame unit.
Sew the flame section to the top of each candle body. Press seams open or to one side, depending on your preference.
At this stage, you should have three candle units.
Step 3: Make the Bow Units
For each candle base, create a bow using the dark green fabric.
An easy method is to make a simple bow shape with diagonally placed pieces on both sides of the candle base. This gives the effect of ribbon loops.
For each bow:
- Place one green triangle or corner unit on the left side
- Place one green triangle or corner unit on the right side
- Add a small background connector between or below if needed
Press and trim each bow section so it matches the width of its candle.
Step 4: Join Candle and Bow Sections
Sew one bow unit to the bottom of each candle.
You should now have three complete candle units with:
- flame
- candle body
- bow at the base
Press well.
Step 5: Add Background Pieces
Place background fabric between and around the candle units until the layout measures 12 1/2″ x 12 1/2″ unfinished.
Make sure:
- the candles are evenly spaced
- the top edges align nicely
- the bottom bow sections sit level
- the outer edges are squared up
Sew the background sections in rows or vertical sections, whichever is easier for your construction style.
Step 6: Assemble the Block
Join the sections together and press flat.
Trim the completed block to:
12 1/2″ x 12 1/2″ unfinished
This will give you a 12″ x 12″ finished block once sewn into a quilt.
Pressing Tips
Good pressing makes this block look polished.
- Press after every seam
- Use a dry iron first, then steam lightly if needed
- Avoid stretching the flame points and bow edges
- Square up often during assembly
Color Ideas
This block looks beautiful in many palettes:
- Traditional Christmas – red, green, gold
- Soft vintage – cream, sage, dusty rose
- Modern holiday – white, charcoal, deep red
- Scrappy version – mixed reds and greens from your stash
Ways to Use This Block
You can use this block for:
- a Christmas quilt
- a holiday pillow
- a table topper
- a wall hanging
- a festive mini quilt
Make several blocks and alternate them with plain or star blocks for a larger quilt.
Beginner Notes
If you are a beginner, this is a very friendly project because:
- it uses simple piecing
- the shapes are easy to adjust
- it is great for practicing layout and balance
- it works well with scraps
The only part that may need a little extra care is keeping the flames centered and the bows symmetrical.
Candle Quilt Block pdf pattern
This 12″ candle quilt block is a sweet and festive design that adds warmth to any holiday sewing project. Whether you make just one block or turn it into a full quilt, it is a fun way to use seasonal prints and bring a cozy handmade touch to your decor.