Welcome to the Quilt Missouri Tutorials website, where creativity knows no bounds! If you’re an avid quilter or just starting on your quilting journey, we have a treat for you. In this tutorial, we’ll explore the mesmerizing world of beads quilting and provide you with a free pattern to unleash your artistic potential.
The Beads Quilt pattern is not only visually striking but also a joy to create. Let’s dive in and bring this stunning design to life.
Materials Needed:
Fabric: Choose a variety of colors to create contrast and depth.
Thread: High-quality thread for both piecing and quilting.
Batting: Choose a batting that suits your desired quilt thickness.
Backing fabric: Coordinate with your quilt top or choose a contrasting color.
Sewing machine and basic sewing supplies.
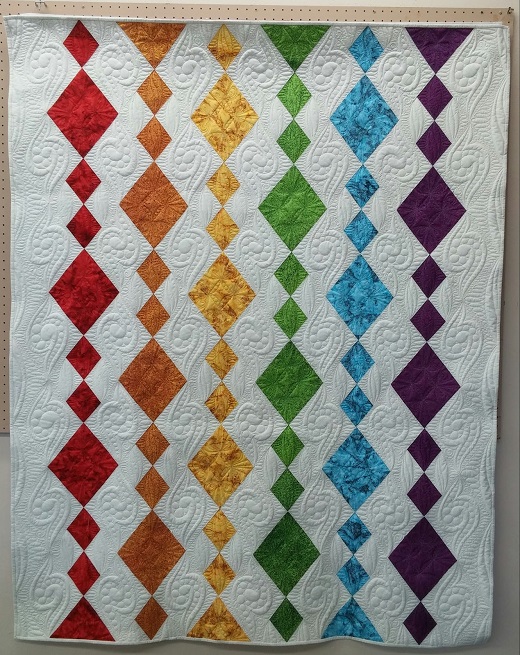
Fabric Requirements:
- 9 Quarter Yards OR 9 Fat Quarters OR 18 Fat Eighths
- Background: 4 1/8 yards
- Border: ¾ yard
- Binding: ¾ yard
- Backing: 5 yards
Cutting Instructions:
From quarter yards, cut 1 strip at 5 x 44” and 1 strip at 2 ½ x 44” from each of the 9 fabrics. Cut each in half along the fold to yield 18 strips of each size. If using fat quarters, cut 2 strips at 5 x 22” and 2 strips at 2 ½ x 22” from each of the 9 fabrics, totaling 18 strips of each size. If using fat eighths, cut 1 strip at 5 x 22” and 1 strip at 2 ½ x 22” from each of the 18 fabrics, resulting in 18 strips of each size.
Background:
- Cut 18 strips at 2 ½ x 44”. Cut each strip in half along the fold to get 36 strips.
- Cut 9 strips at 7 x 44”. Cut each strip in half along the fold to get 18 strips.
- Cut 2 strips at 13 ¼” from the width of the fabric. Sub-cut into 6 – 13 ¼” squares. Cut each across both diagonals to get 24 side-setting triangles. (*Note: In the tutorial video, Donna suggests cutting these pieces at 13”, but cutting them to 13 ¼” works better for this design.)
- Cut 1 strip at 7” WOF. Cut 2 – 7” squares. Cut across one diagonal to get 4 corner triangles.
Border:
Cut 8 strips at 3” WOF.
Sewing Instructions:
Make a strip unit with a 5” colored strip and 2 of the 2 ½” background strips. Press seams toward the center strip. Sub-cut into 5” segments. Cut 4 from each strip unit. Repeat to make a total of 72.
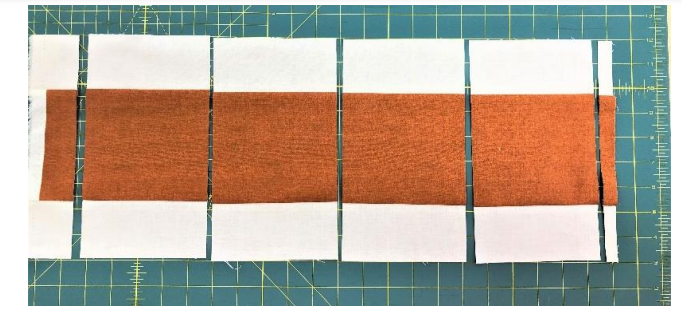
Make a strip unit with a 7” background and a 2 ½” colored strip. Press seam towards the print. Sub-cut to 2 ½” segments. Get 8 from each strip unit for a total of 144.
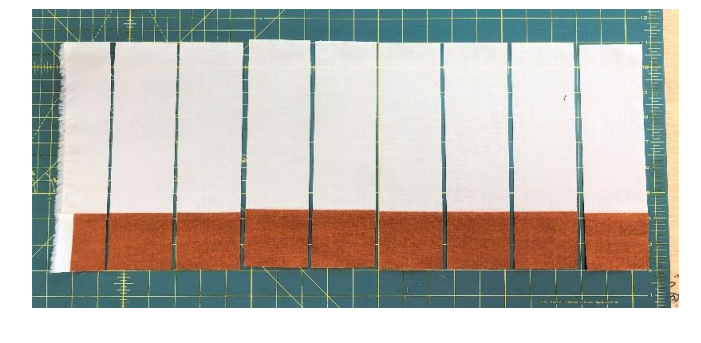
Gather matching strip units to create the square. Stitch together and press all seam allowances to one side. Make 8 blocks from each color. The block should now measure 9”. Repeat with all colors to make a total of 72 blocks.

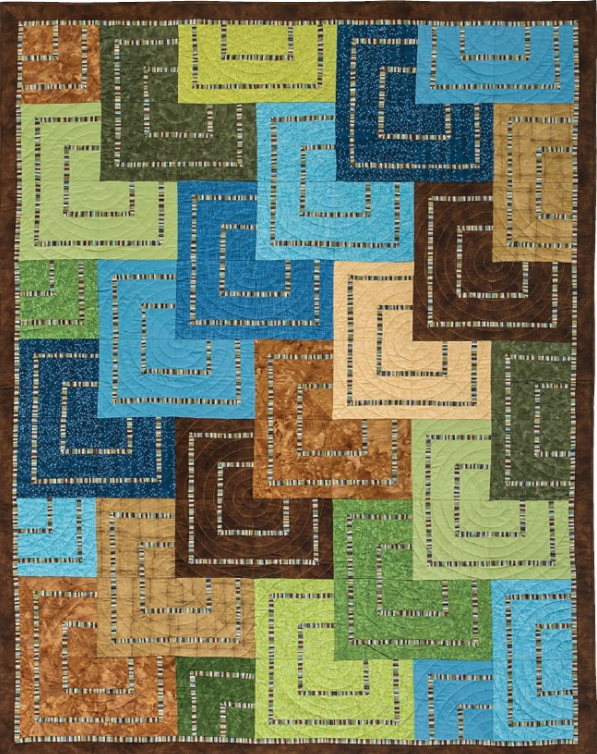
Lay out the blocks and setting triangles as shown in the picture of the finished quilt. Stitch into rows and stitch rows together.
Border:
Cut 8 strips at 3” WOF. Stitch short edges together to make one long border. Measure the width of your quilt top and cut 2 borders this size. Pin, then stitch the borders onto the top and bottom of the quilt. Follow the same procedure for the side borders by measuring the length of the quilt.
For those eager to dive into the details and explore the Beads Quilt Free Pattern at your own pace, we’ve made it easy for you. Feel free to access the PDF version of the pattern by clicking the link below:
Feel free to experiment with colors, bead placement, and block arrangements to make this pattern uniquely yours. Share your masterpiece with the Quilt Missouri community, and let the beads quilt pattern inspire fellow quilters on their creative journeys. Happy quilting!

2 Comments
excellent points altogether, you simply received a brand new reader. What would you recommend in regards to your put up that you simply made a few days in the past? Any sure?
Right now it seems like WordPress is the best blogging platform available right now. (from what I’ve read) Is that what you’re using on your blog?