Quilting is an art form that transcends generations, weaving stories and memories into every stitch. For enthusiasts seeking a captivating and intricate design, the Chained Star Quilt Block pattern is a stellar choice. This block combines traditional charm with a modern twist, creating a visually striking masterpiece that will leave everyone in awe.
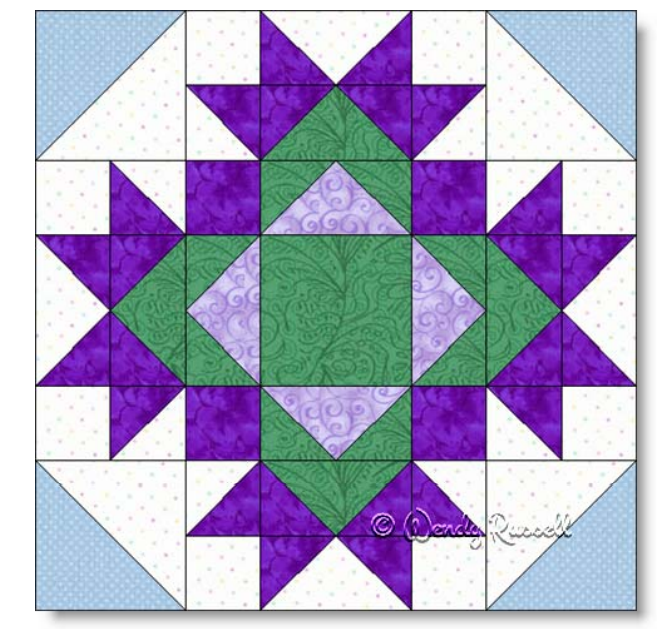
The Chained Star pattern draws its charm from a combination of basic quilt block components, including squares and half-square triangles, cleverly arranged to form a radiant star at the center. The star is then surrounded by a chain element, adding a dynamic and visually engaging aspect to the overall design. The pattern’s brilliance lies in its ability to capture attention while still maintaining a sense of balance and harmony.
In this tutorial, we will delve into the steps to create the Chained Star Quilt Block and explore the endless possibilities for incorporating it into your quilting projects.
Creating the Chained Star Quilt Block involves a series of carefully planned steps. The pattern often includes the use of solid-colored fabrics to construct the star points, background, and chain, emphasizing the precision of cutting and piecing. Techniques such as sewing half-square triangles, creating Four Patch units, and assembling hourglass blocks contribute to the block’s intricate structure.
Incorporating the Chained Star Block into Quilt Projects:
Once you’ve mastered the Chained Star Quilt Block, the possibilities are endless. Here are a few ideas for incorporating this block into your quilting projects:
- Quilted Throws: Create a cozy and visually stunning quilted throw by repeating the Chained Star pattern across the entire surface.
- Pillow Covers: Craft elegant pillow covers by making smaller versions of the Chained Star Block. Mix and match colors for a dynamic and eye-catching display.
- Table Runners: Design a sophisticated table runner by arranging multiple Chained Star Blocks in a row. Play with color placement to achieve a captivating effect.
- Wall Hangings: Showcase your quilting prowess by turning the Chained Star Block into a beautiful wall hanging. Experiment with different sizes and arrangements to create a unique composition.
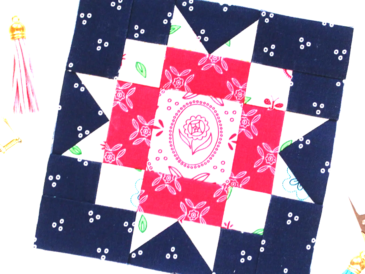
Chained Star Quilt Block Pattern
Fabric Selection:
- WHITE (Kona® Cotton)
- BABY PINK (Kona® Cotton)
- BERRY (Kona® Cotton)
- BLOOD (Kona® Cotton)
Note: Feel free to use your preferred fabrics!
Finished Block Size: 12″ square
Cutting Instructions: From solid WHITE, cut:
- 2 squares measuring 5.5″
- 8 squares measuring 2.5″
From solid BABY PINK, cut:
- 6 squares measuring 2.5″
From solid BERRY, cut:
- 6 squares measuring 2.5″
From solid SANGRIA, cut:
- 2 squares measuring 5.5″
Assembling the Block:
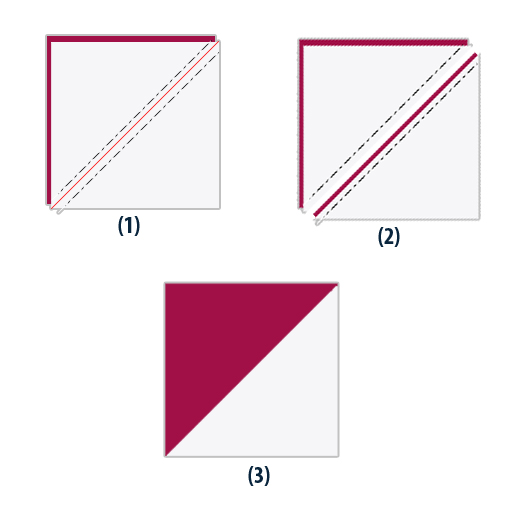
Mark a diagonal line on the wrong side of one of the WHITE 5.5″ squares using a pencil. Layer the marked WHITE square on top of the SANGRIA 5.5″ square. Sew together with two seams, stitching 1/4″ on each side of the drawn line (refer to Diagram 1). Cut the pair apart on the drawn line and press open to create two half-square triangle patches.
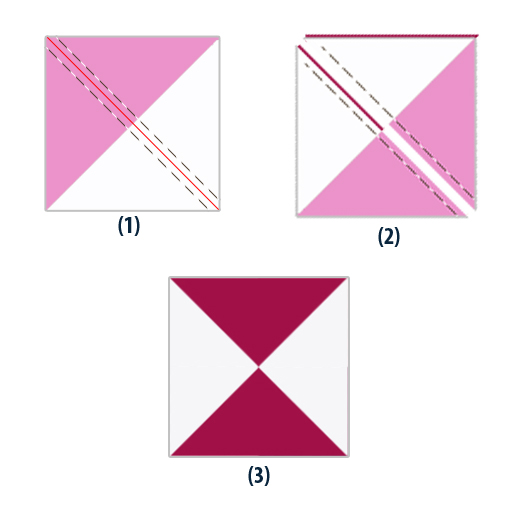
Mark a diagonal line perpendicular to the seam line on the wrong side. Match two half-square triangle patches, right sides together, and rotate one of the patches 180 degrees so the colors oppose each other (see Diagram 2). Sew 1/4″ from each side of the drawn line. Cut the pair apart on the drawn line and press open to produce two hourglass units. Repeat these steps to make a total of four hourglass units.
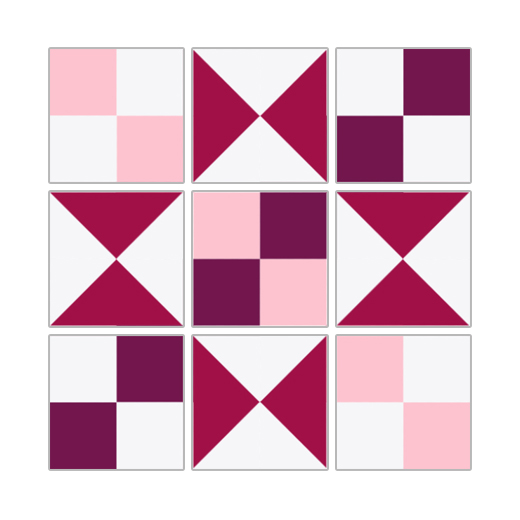
Using four BABY PINK 2.5″ squares and four WHITE 2.5″ squares, sew together two Four Patch units (see Diagram 3 (1)).
Using four BERRY 2.5″ squares and four WHITE 2.5″ squares, sew together two Four Patch units (refer to Diagram 3 (2)).
With the remaining two BABY PINK 2.5″ squares and two BERRY 2.5″ squares, create a Four Patch unit (see Diagram 3 (3)).

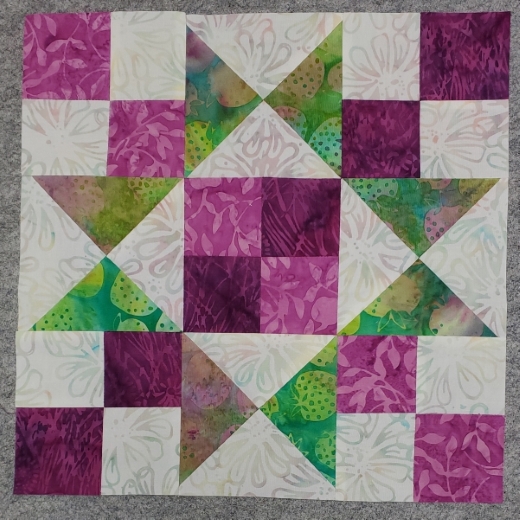
Arrange the four Hourglass units and the five Four Patch units as shown in Diagram 4.
Sew the units together into three rows, pressing the seam allowances toward the Four Patch units (refer to Diagram 5).
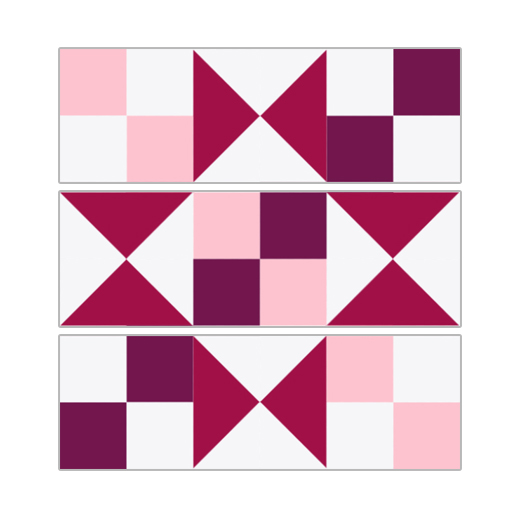
Finally, sew the three rows together to complete the Chained Star Quilt Block. Press the seam allowances, and your stunning block is ready to be incorporated into your quilt project!
The Chained Star Quilt Block pattern opens the door to a world of creativity and craftsmanship. Whether you’re a seasoned quilter or a novice, this design offers a captivating challenge that will result in a quilted masterpiece. Embrace the art of quilting, and let the Chained Star Block shine in your next project, weaving a tale of skill, tradition, and beauty.