The Showering Stars Quilt Pattern pairs bright white star points with long trails of colorful fabric against a deep plum background. Four stars sit at different heights, giving the quilt a sense of movement while leaving generous areas of open space. The patchwork centers bring the colors together, and the narrow trails carry them from the stars toward the quilt’s edges.
Showering Stars is an original quilt design by Robin Pickens. The reference shown here features her Sweet Pea & Lily fabric collection, with purple, green, pink, and gray prints. You can read about the original design and its color variations on Robin Pickens’ Showering Stars page.
For the version discussed in this article, a separate measured reconstruction guide has been drafted from the reference image. The free PDF at the end includes cutting tables, colored diagrams, trail sequences, and a column-by-column assembly chart. Its measurements and construction steps belong to this reconstruction, which has not been test-sewn. Begin with a test center, point unit, and trail rail before cutting the entire project.
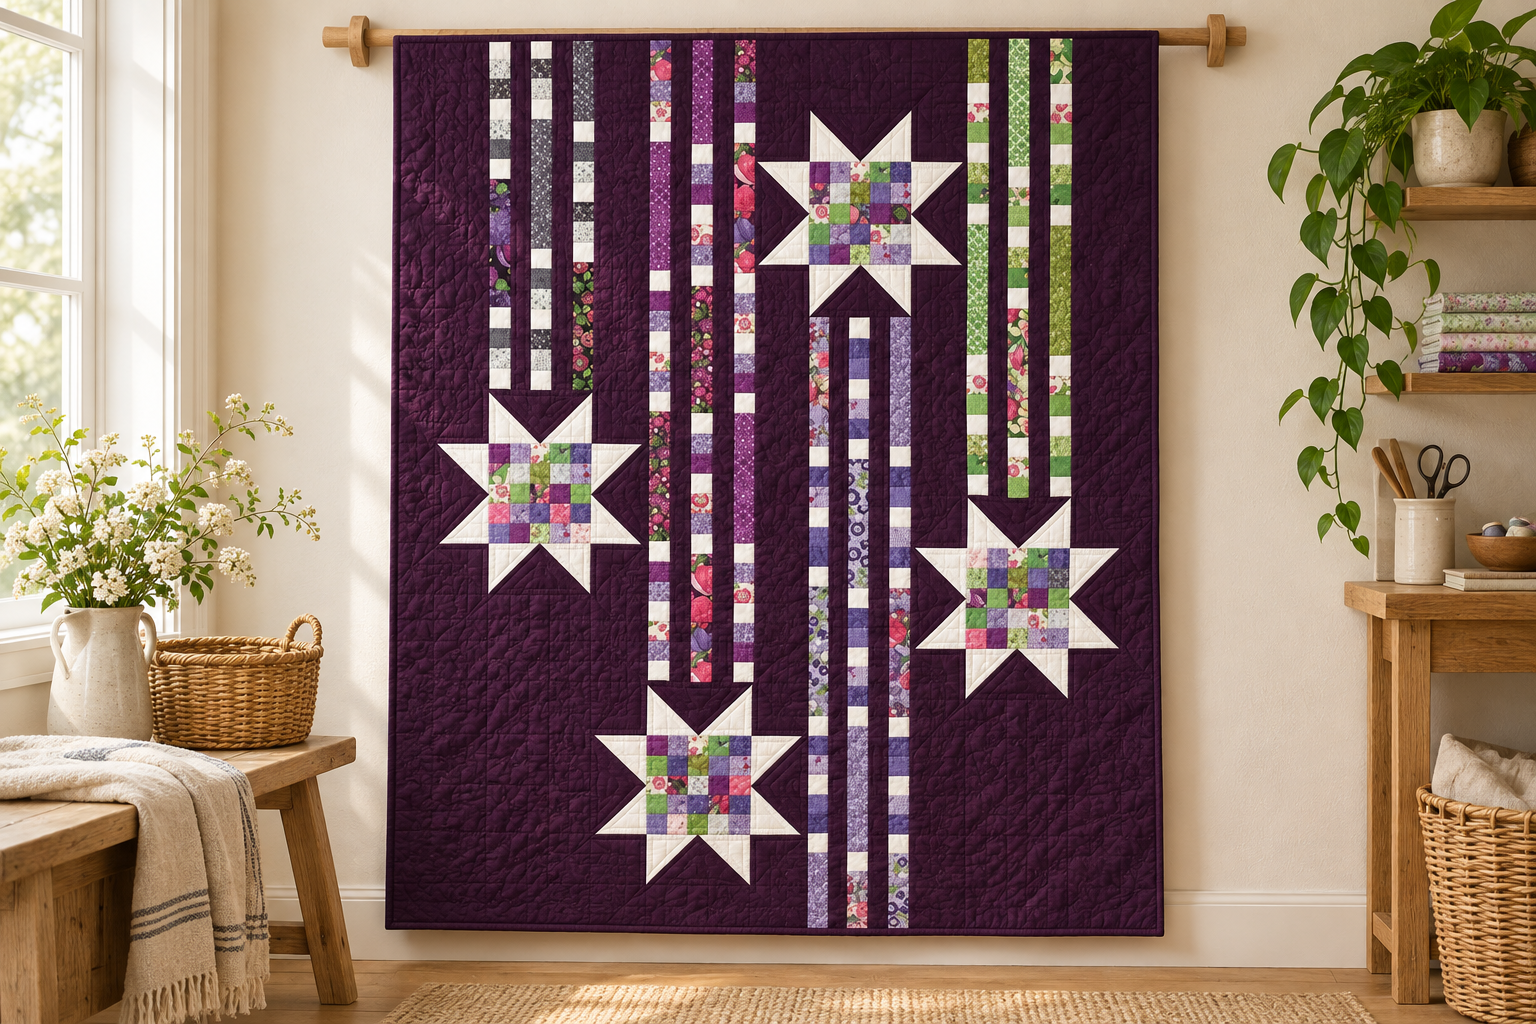
The contrast between the stars and the background gives this quilt much of its character. White points remain clearly visible against the dark plum, while the small printed squares soften the centers with changes in color and texture. The stars are large enough to read from across a room, yet their centers reward a closer look.
The trails add another layer of interest. Each one contains three narrow printed rails, separated by background fabric. Small white dashes interrupt the printed sections, echoing the white points of the stars. Because those dashes sit at different heights, the trails have a scattered, sparkling effect rather than looking like solid stripes.
Three trails extend above their stars, while the trail beneath the upper star reaches toward the bottom of the quilt. This change in direction gives the composition its balance. Keep that arrangement in mind when laying out the pieces: turning the upper star’s trail around would change the overall design.
Finished Size and Skill Level
The finished quilt size is 75 × 90 inches, or 190.5 × 228.6 cm. This matches the size shown on the supplied reference and confirmed in the designer’s official correction for Showering Stars.
In the reconstruction, each star occupies a 20-inch square and contains a 10-inch patchwork center. The trails finish at 10 inches wide. Their different lengths position the four stars at different heights without adding separate borders.
This version is suitable for confident beginners and intermediate quilters who are comfortable with a consistent quarter-inch seam. Most of the sewing uses squares, rectangles, and stitch-and-flip corners. The main challenge is keeping the long columns straight and aligning the star points with their patchwork centers.
Materials for the Reconstructed Version
The PDF uses its own cutting method, so its fabric quantities have been recalculated. Follow this list when making the reconstruction:
| Material | Amount |
|---|---|
| Deep plum background | 5½ yards, with at least 40 usable inches of width |
| White star points and trail dashes | 1¼ yards |
| Coordinating prints | One standard 40-strip Jelly Roll, or 24 strips measuring 2½ × 40 usable inches |
| Binding | ¾ yard |
| Wide backing | 3 yards of 108-inch-wide fabric |
| Batting | At least 83 × 98 inches |
You will also need a rotary cutter, cutting mat, quilting rulers, thread, pins, an iron, and a reliable quarter-inch seam allowance. The PDF includes alternatives for piecing a backing from narrower fabric.
The background quantity includes a cutting plan for long, continuous panels and trail separators. These pieces are cut along the fabric length. Check the layout before making any width-of-fabric cuts so you do not accidentally use a section reserved for one of the longer panels.
Choosing Prints and Background Fabric
A coordinated strip collection makes it easier to distribute color throughout the quilt. Choose prints with a range of values, including light, medium, and dark fabrics. Small florals, textures, and subtle geometric prints can all work in the two-inch finished rails and patchwork squares.
To stay close to the reference, group some purple and pink fabrics into one trail, cooler violet and gray fabrics into another, and greens into the right-hand trail. The star centers can mix colors from all of those groups. That repetition helps the four stars feel connected even though their trails have different color emphasis.
Before cutting, place a white fabric sample beside your chosen background and several prints. View the combination from a few steps away. The white points should remain distinct, and the printed rails should still be visible against the background. A very dark print may blend into plum; that can provide a quiet section in a trail, but too many such pieces may make the rail difficult to follow.
Helpful Quilting Terms
| Term | Meaning |
|---|---|
| WOF | Width of fabric, excluding the selvages |
| Finished size | Size after seam allowances are sewn into the quilt |
| Unfinished size | The size of a prepared unit before it is joined to adjoining pieces |
| Stitch and flip | Sewing a square diagonally onto a base, trimming the corner, then opening and pressing the added fabric |
| Rail | One narrow vertical strip of joined printed and white segments |
How the Reconstruction Is Assembled
1. Make Four Patchwork Centers
Each star center uses 25 printed 2½-inch squares arranged in five rows of five. Sew the squares into rows, then join the rows. Press neighboring row seams in opposite directions if you want to nest the intersections.
Each completed center should measure 10½ inches square unfinished. Label the centers S1 through S4 and keep them with their assigned trail fabrics. Labels are especially helpful once the side points and background panels have been prepared.
2. Prepare the White-Point Units
The star points are made with a plum rectangle and two white squares. Stitch-and-flip construction places a white triangle at each end, leaving a large plum triangle between them. The PDF shows the diagonal sewing direction and how to trim the unit.
Make 16 point units, each measuring 5½ × 10½ inches unfinished. Their orientation changes according to their position around the star. The plum triangle always points toward the patchwork center, allowing the white triangles to form the outward points.
3. Piece the Colorful Rails
Each trail contains three rails made from printed rectangles and small white squares. The PDF lists every rail in order, using a simple code for the finished segment lengths. For example, a six-inch printed segment is cut at 2½ × 6½ inches, including seam allowances.
Keep each rail’s pieces in a separate stack or labeled tray. Sew a short section, press it, and check your seam allowance before continuing. Small differences can accumulate along a long rail, so checking early helps prevent uneven lengths later.
4. Join the Rails into Trails
Add a narrow plum separator between the first and second rails and another between the second and third rails. The complete order is printed rail, plum separator, printed rail, plum separator, printed rail.
Each trail measures 10½ inches wide unfinished. The four finished trail lengths in this reconstruction are 36, 66, 62, and 46 inches. The 62-inch trail belongs below the upper star; the other three extend above their stars.
5. Build the Nine Columns
The quilt is assembled in nine vertical columns. The star centers and their upper and lower point units sit within the wider columns. Separate side-point bands are placed in the neighboring columns, surrounded by plum panels.
This means you should prepare the star components without joining them into four complete star blocks first. Follow the column chart to place each side-point band at the correct height. When the columns are sewn together, the separate components meet to form the stars.
6. Match the Star Intersections
Lay all nine columns in order and check their measurements. Each one should be 90½ inches long unfinished. Pin the seams at the upper and lower edges of each patchwork center to the corresponding side-point seams before distributing the rest of the column evenly.
Support the fabric while sewing so the weight of the quilt does not pull on the long joins. If one column is noticeably longer, check the individual sections and seam allowances before proceeding. Once assembled, the top should measure 75½ × 90½ inches including seam allowances.
Quilting the Open Background
The open plum areas offer room to add texture without competing with the patchwork. Gentle curves can soften the straight trails, while closely following the rails with quilting lines can emphasize their direction. A simple overall design is also an option if you prefer a consistent texture across the quilt.
Choose thread according to the effect you want. A color that blends with the background keeps attention on the piecing; a more visible thread makes the quilting a stronger part of the design. Test the combination on a small layered sample before working on the top.
Finishing the Quilt
Prepare backing and batting that extend at least four inches beyond the finished top on each edge. Press the top and backing, remove loose threads, and baste the layers carefully. Follow your batting manufacturer’s guidance for quilting distance.
After quilting, square the edges while preserving the outer seam allowances. The guide includes a double-fold binding plan made from ten 2½-inch strips. A binding close to the background color gives the edge a quiet finish, while a coordinating plum print can add a subtle change in texture.
The Showering Stars measured reconstruction PDF contains 12 pages with fabric quantities, cutting schedules, a measured layout, patchwork-center instructions, point-unit diagrams, complete rail sequences, and all nine column recipes. A background cutting plan helps you reserve fabric for the long panels before cutting the smaller pieces.
Showering Stars Quilt Pattern PDF
Keep the diagrams nearby as you work and check the unfinished size of each component. Begin with a few test units, then sew the project in stages: centers, points, trails, side bands, and columns.
For the original pattern and the designer’s own instructions, visit Robin Pickens’ Showering Stars page.