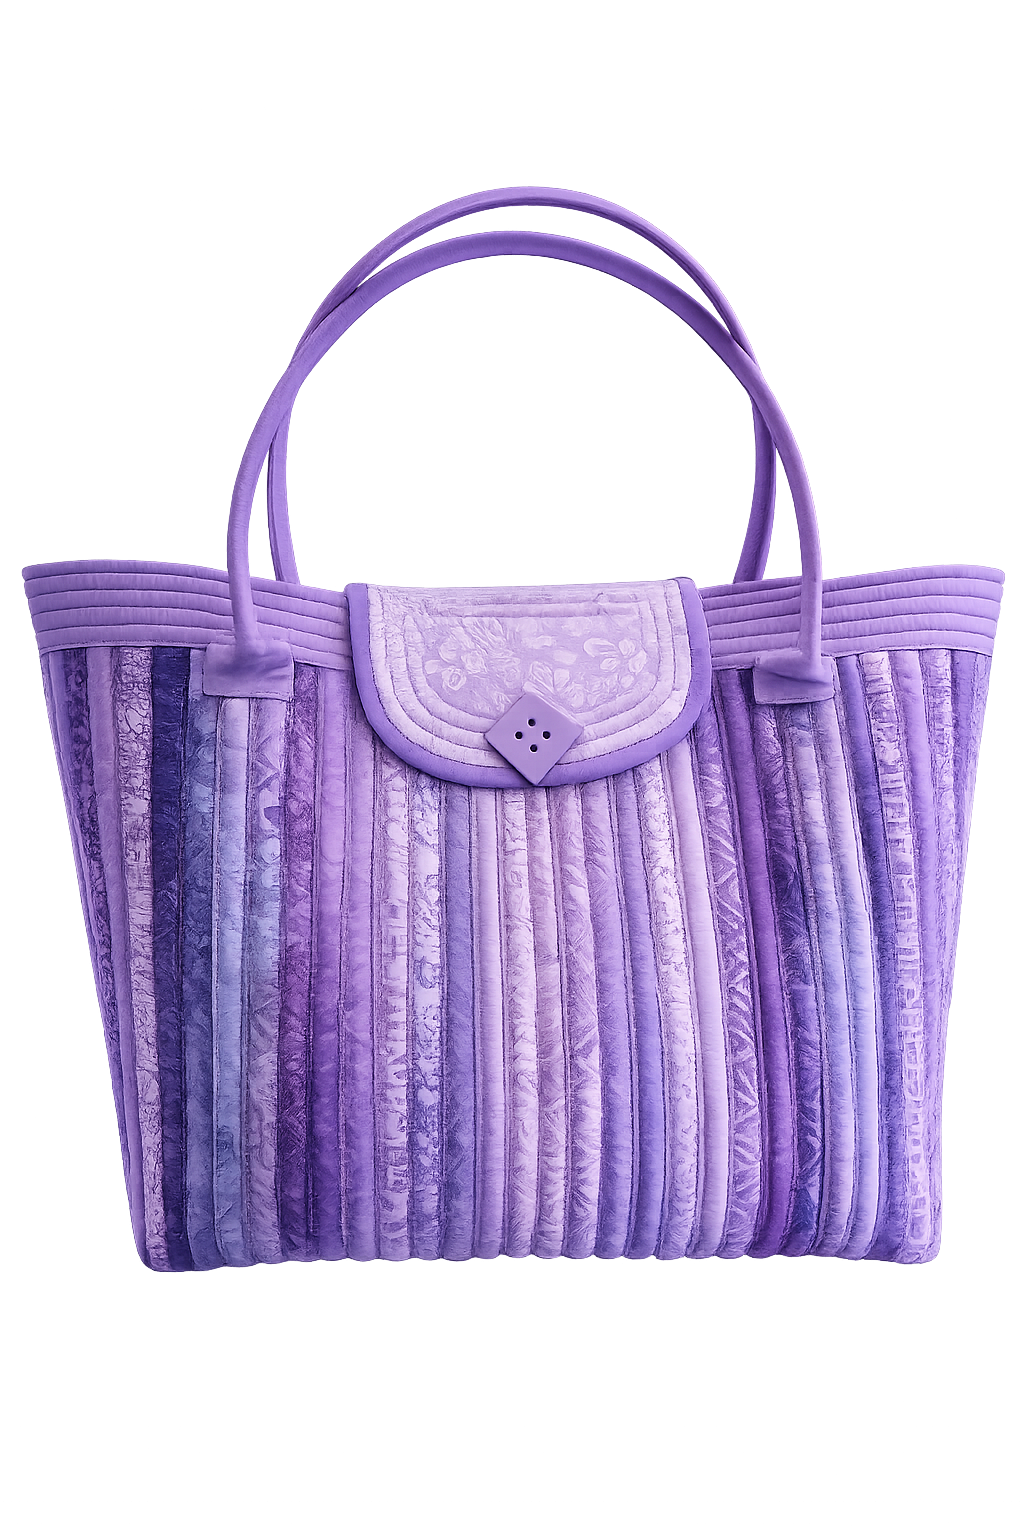
If you love quilting projects that are both beautiful and practical, this oversized jelly roll tote bag is the perfect weekend sewing project. Inspired by the same fabric tube technique often used in quilted rugs, this bag combines sturdy construction with a soft, flexible finish that makes it ideal for travel, craft storage, beach days, or even carrying quilting supplies.
What makes this project especially fun is that it works wonderfully with jelly roll strips, allowing you to showcase coordinated fabrics and create stunning color movement throughout the bag. The finished tote is generously sized, durable, and completely customizable depending on your fabric choices.
In this tutorial, you’ll learn how to create fabric tubes, assemble large quilted panels, shape curved side panels, and finish the bag with binding and sturdy handles. Even if you’re new to sewing large quilted bags, this step-by-step guide will help you confidently complete your own oversized tote.
Why You’ll Love This Jelly Roll Tote Bag
This project is perfect for quilters who enjoy:
- Using jelly rolls or fabric scraps
- Creating functional quilted accessories
- Sewing oversized bags
- Practicing zigzag joining techniques
- Making unique handmade gifts
The texture created by the fabric tubes gives the tote a cozy, structured appearance while still remaining soft and flexible. The curved side panels also give the bag a more polished and professional look compared to basic rectangular totes.
Materials Needed
Fabric
- 30 jelly roll strips (2½” x approximately 44”)
- Additional strips for:
- 2 side panels
- binding
- OR fat quarters cut into strips and sewn together
Batting
- Cotton batting strips sized to fit inside each fabric tube
Sewing Supplies
- Sewing machine
- Walking foot (highly recommended)
- Rotary cutter
- Cutting mat
- Clips or pins
- Iron
- Thread
- Zigzag stitch setting
- Magnetic seam guide (optional)
Optional Tools
- Gypsy Tube Maker
- Clover fabric tube tool
The tutorial uses approximately 30 fabric tubes for the main body of the tote bag.
Step 1: Prepare the Fabric Strips
Start with jelly roll strips measuring 2½” wide. Most jelly roll strips are around 40–44 inches long. If you are using fat quarters, cut them into strips and sew two strips together diagonally to achieve the longer length needed for the tote.
Using coordinated fabrics creates a beautiful flowing effect across the finished bag, but scrap fabrics can create a charming patchwork appearance as well.
Step 2: Create the Fabric Tubes
To create the quilted tubes:
- Place batting in the center of the strip.
- Fold both outer edges inward toward the center.
- Fold the strip in half again.
- Sew along the long edge using approximately a ¼” seam allowance.
A tube maker tool can help keep folds even and speed up the process, but it’s completely optional.
The creator prefers sewing along the side instead of directly down the center because it gives a cleaner visual finish.
Step 3: Sew All Tubes
Continue sewing until all fabric strips have been transformed into tubes.
Helpful tips:
- Use a walking foot for smoother feeding
- Sew slowly for more consistent results
- Keep seam widths even
- A magnetic seam guide helps maintain straight stitching
The large tote uses:
- 30 tubes for the body
- 3 tubes per side panel
- 2 additional strips for binding
Step 4: Arrange the Fabric Layout
Before joining the tubes together, arrange the colors and prints into your preferred layout.
This is an important step because once the zigzag joining begins, changing the arrangement becomes difficult. Take a photo of your layout if needed to help remember the order.
Step 5: Join the Tubes with Zigzag Stitching
Using a zigzag stitch set to:
- Width: 5
- Length: 2.5
Join the tubes edge-to-edge without overlapping them.
Important Tips
- Do not pull or stretch the fabric
- Let the machine feed naturally
- Keep the edges aligned evenly
- Work slowly to avoid shifting
The tutorial recommends assembling the tubes into smaller panels first rather than attaching all strips one by one. This helps reduce distortion and keeps the finished rectangle straighter.
Step 6: Press the Panels
After creating the panels:
- Lay them flat
- Gently pull and straighten the fabric
- Press with an iron to flatten and stabilize the panels
This helps keep the large quilted sections square and easier to sew together later.
Step 7: Assemble the Main Bag Panel
Sew the completed sections together using the same zigzag stitch until one large rectangular panel is formed.
As the project becomes larger:
- Roll excess fabric when sewing
- Support the weight of the bag
- Keep fabric feeding evenly through the machine
Some strip ends may not line up perfectly, which is completely normal. Everything will be trimmed later.
Step 8: Create the Curved Side Panels
For each side panel:
- Use 3 fabric tubes
- Fold the first tube into a soft U-shape
- Add the second and third tubes around it
- Pin carefully to maintain the curved shape
The fabric should bunch slightly around the curve to help it lie flat once sewn.
Sew:
- One center seam
- Then U-shaped seams around the outer edges using the zigzag stitch
Repeat to create two matching side panels.
Step 9: Trim the Main Panel
Using a rotary cutter and grid mat:
- Square up both ends
- Trim uneven strip edges
- Ensure both sides are even and straight
The finished length is approximately 40 inches.
Step 10: Attach the Side Panels
This is one of the trickiest parts of the project because of the bulk.
Helpful techniques include:
- Rolling the main body while sewing
- Keeping the needle down when repositioning
- Working slowly around curves
- Adjusting fabric constantly to prevent puckering
Take your time here. Small adjustments make a huge difference in the finished shape.
Step 11: Add the Binding
Create binding strips by folding fabric strips in half twice.
Attach the binding around the top edge of the bag using clips to hold everything securely in place.
The binding ends overlap slightly and are tucked inward for a clean finish.
If adding a lining, it’s best inserted before attaching the final binding.
Step 12: Add the Handles
The handles can be:
- Purchased handles
- Handmade fabric handles
- Leather straps
The tutorial places the handles approximately eight strips inward from the side panel.
Heavy-duty or upholstery thread is highly recommended because this oversized tote can become quite heavy when filled.
Optional: Add a Fabric Lining
A lining gives the bag:
- Extra durability
- A cleaner interior finish
- Better structure
Simple cotton lining fabric works perfectly and can be sewn into the bag before the final binding is attached.
Finished Tote Bag Ideas
This oversized tote is perfect for:
- Quilting retreats
- Yarn storage
- Beach trips
- Travel
- Grocery shopping
- Sewing projects
- Overnight bags
The sturdy tube construction makes it surprisingly durable while still looking soft and stylish.
This huge jelly roll tote bag is a fantastic way to transform quilting fabrics into something functional, eye-catching, and unique. While the project does require patience—especially when handling the bulky layers the finished result is absolutely worth the effort.
The textured fabric tube construction creates a one-of-a-kind appearance that stands out beautifully, and the oversized shape makes this bag incredibly practical for everyday use.
Whether you use coordinated jelly rolls or colorful scrap fabrics, this tote is guaranteed to become one of your favorite handmade accessories.